Tree Planting

Rhizosphaera Needle Cast: Causes, Symptoms, and Management

By Mike Wilson
ISA Certified Arborist®
May 2, 2024​


Rhizosphaera needle cast is a fungal disease that affects various species of coniferous trees, particularly spruces throughout central Ohio and the midwest, and has become increasingly common. This disease can cause significant damage to tree health and aesthetics if left untreated. Understanding its causes, symptoms, and management strategies is crucial for preventing its spread and minimizing its impact on host trees in your landscape. Rhizosphaera needle cast, or needle cast for short, is primarily caused by the fungus Rhizosphaera kalkhoffii. This fungus thrives in humid and wet conditions, which Ohio is seeing more and more of now. Spores of the fungus are spread through water splash, wind, and contaminated pruning tools, facilitating its transmission from infected to healthy trees. Colorado blue spruce trees (Picea pungens) is especially vulnerable due to the fact that they much prefer dry, arid environments like in Colorado and Utah.

A young Colorado blue spruce tree (Picea pungens) rapidly defoliating

Symptoms

The symptoms of needle cast typically appear on older needles first and progress upwards through the tree. Common symptoms to look out for are:

  • Needle Discoloration: Infected needles initially develop yellow or light green spots, which gradually turn brown or purple-ish brown as the disease progresses.

  • Needle Dropping: Infected needles may prematurely drop from the tree, leading to sparse foliage and an overall thinning of the canopy.

  • Black Fruiting Bodies: Under close inspection, black fruiting bodies (spores) of the fungus may be visible on the surface of infected needles, particularly during humid conditions. This shows up as very fine black peppering found on the underside of the needles.

Black fruiting bodies (spores) of the fungus fungus Rhizosphaera kalkhoffii on the surface of infected needles

Effective management strategies of Rhizosphaera needle cast involves a combination of cultural practices, chemical control, and preventive measures.  

Cultural Practices

  • Proper Tree Spacing: Ensuring adequate spacing between trees promotes good air circulation, reducing humidity levels and minimizing fungal growth.

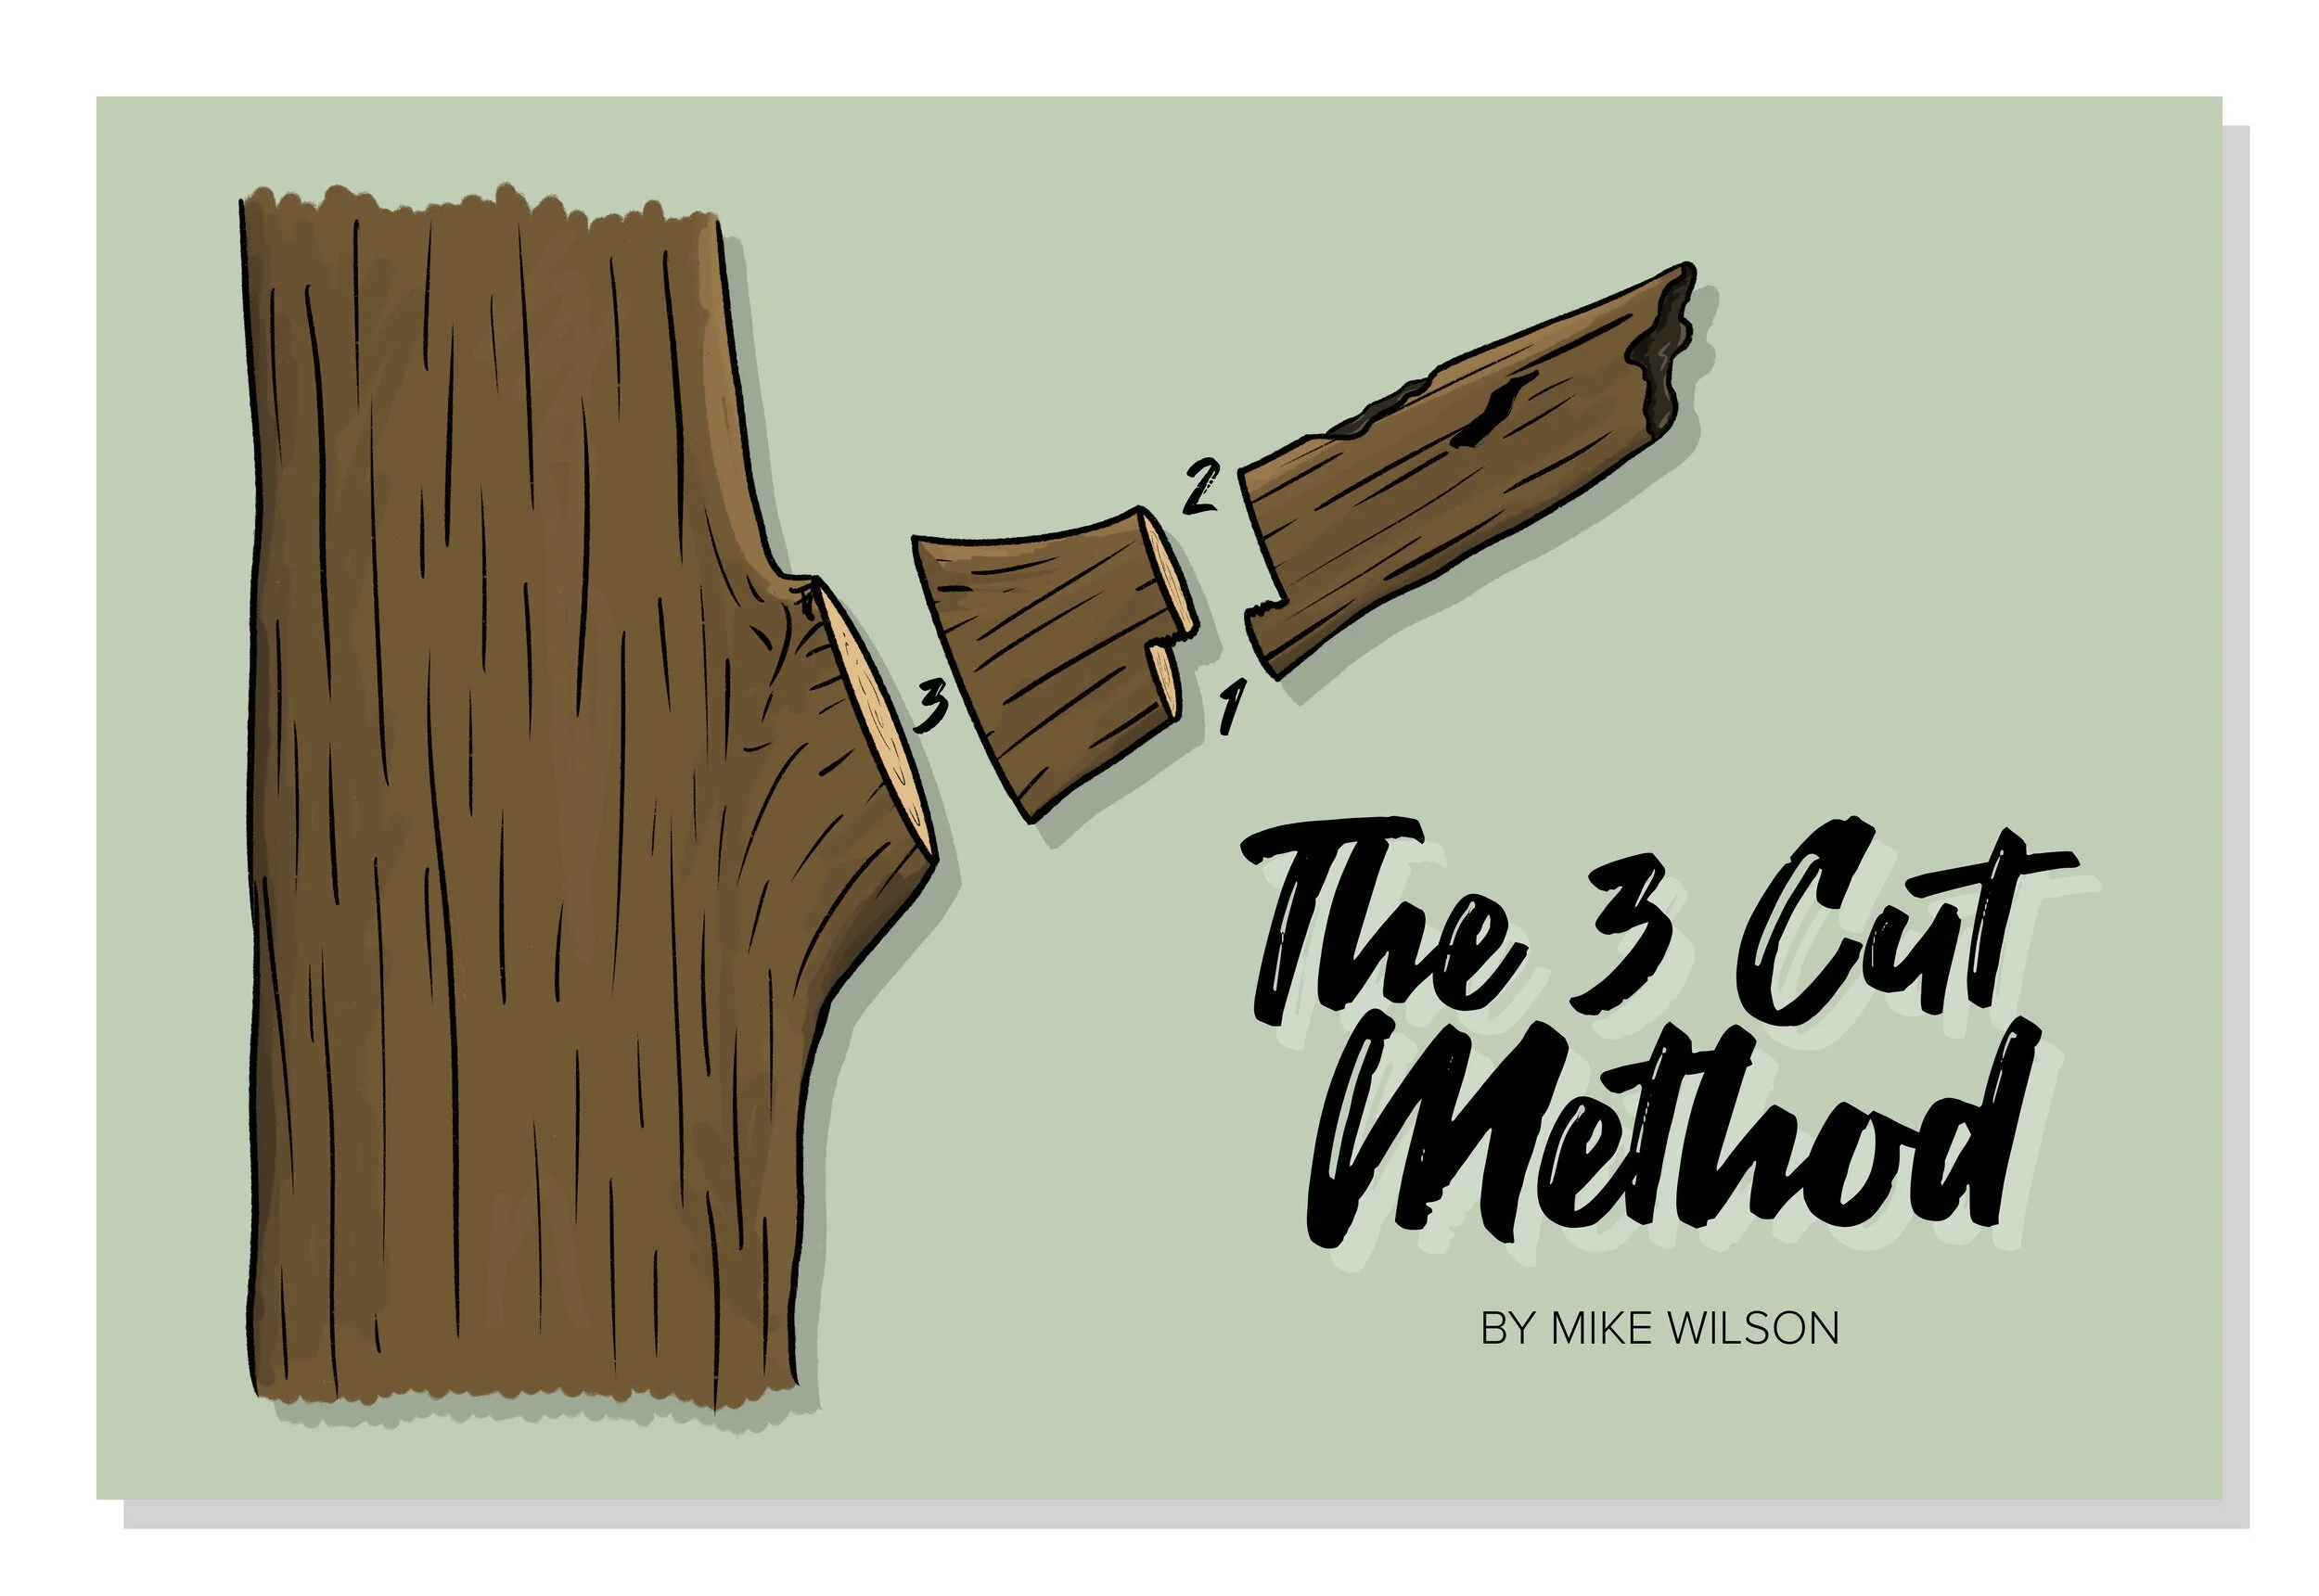
  • Pruning: Prune infected branches to improve air circulation within the canopy and remove sources of fungal spores. Also, lightly elevating the canopy of a tree above the ground can help increase airflow.

  • Mulching: Apply a layer of organic mulch around the base of trees to retain soil moisture and reduce stress, which can help trees resist fungal infections. 

Chemical Control

Apply fungicidal sprays containing active ingredients such as chlorothalonil or copper hydroxide during the spring months as new growth is emerging. Multiple applications in 10 to 14-day intervals applied annually are most effective, however, there is no end-all cure for this fungal disease.

Preventive Measures

  • Monitoring: Regularly inspect trees for early signs of infection, especially during periods of high humidity.

  • Water Management: Avoid overhead watering and excessive irrigation, as these practices can create ideal conditions for fungal growth. Water trees in the morning to avoid foliage staying wet overnight.

  • Plant Selection: Some other options that may be suitable for your landscape include, but are not limited to: Concolor fir (if you desire the silvery blue color), Norway spruce, green giant arborvitae, and Canadian hemlock.  

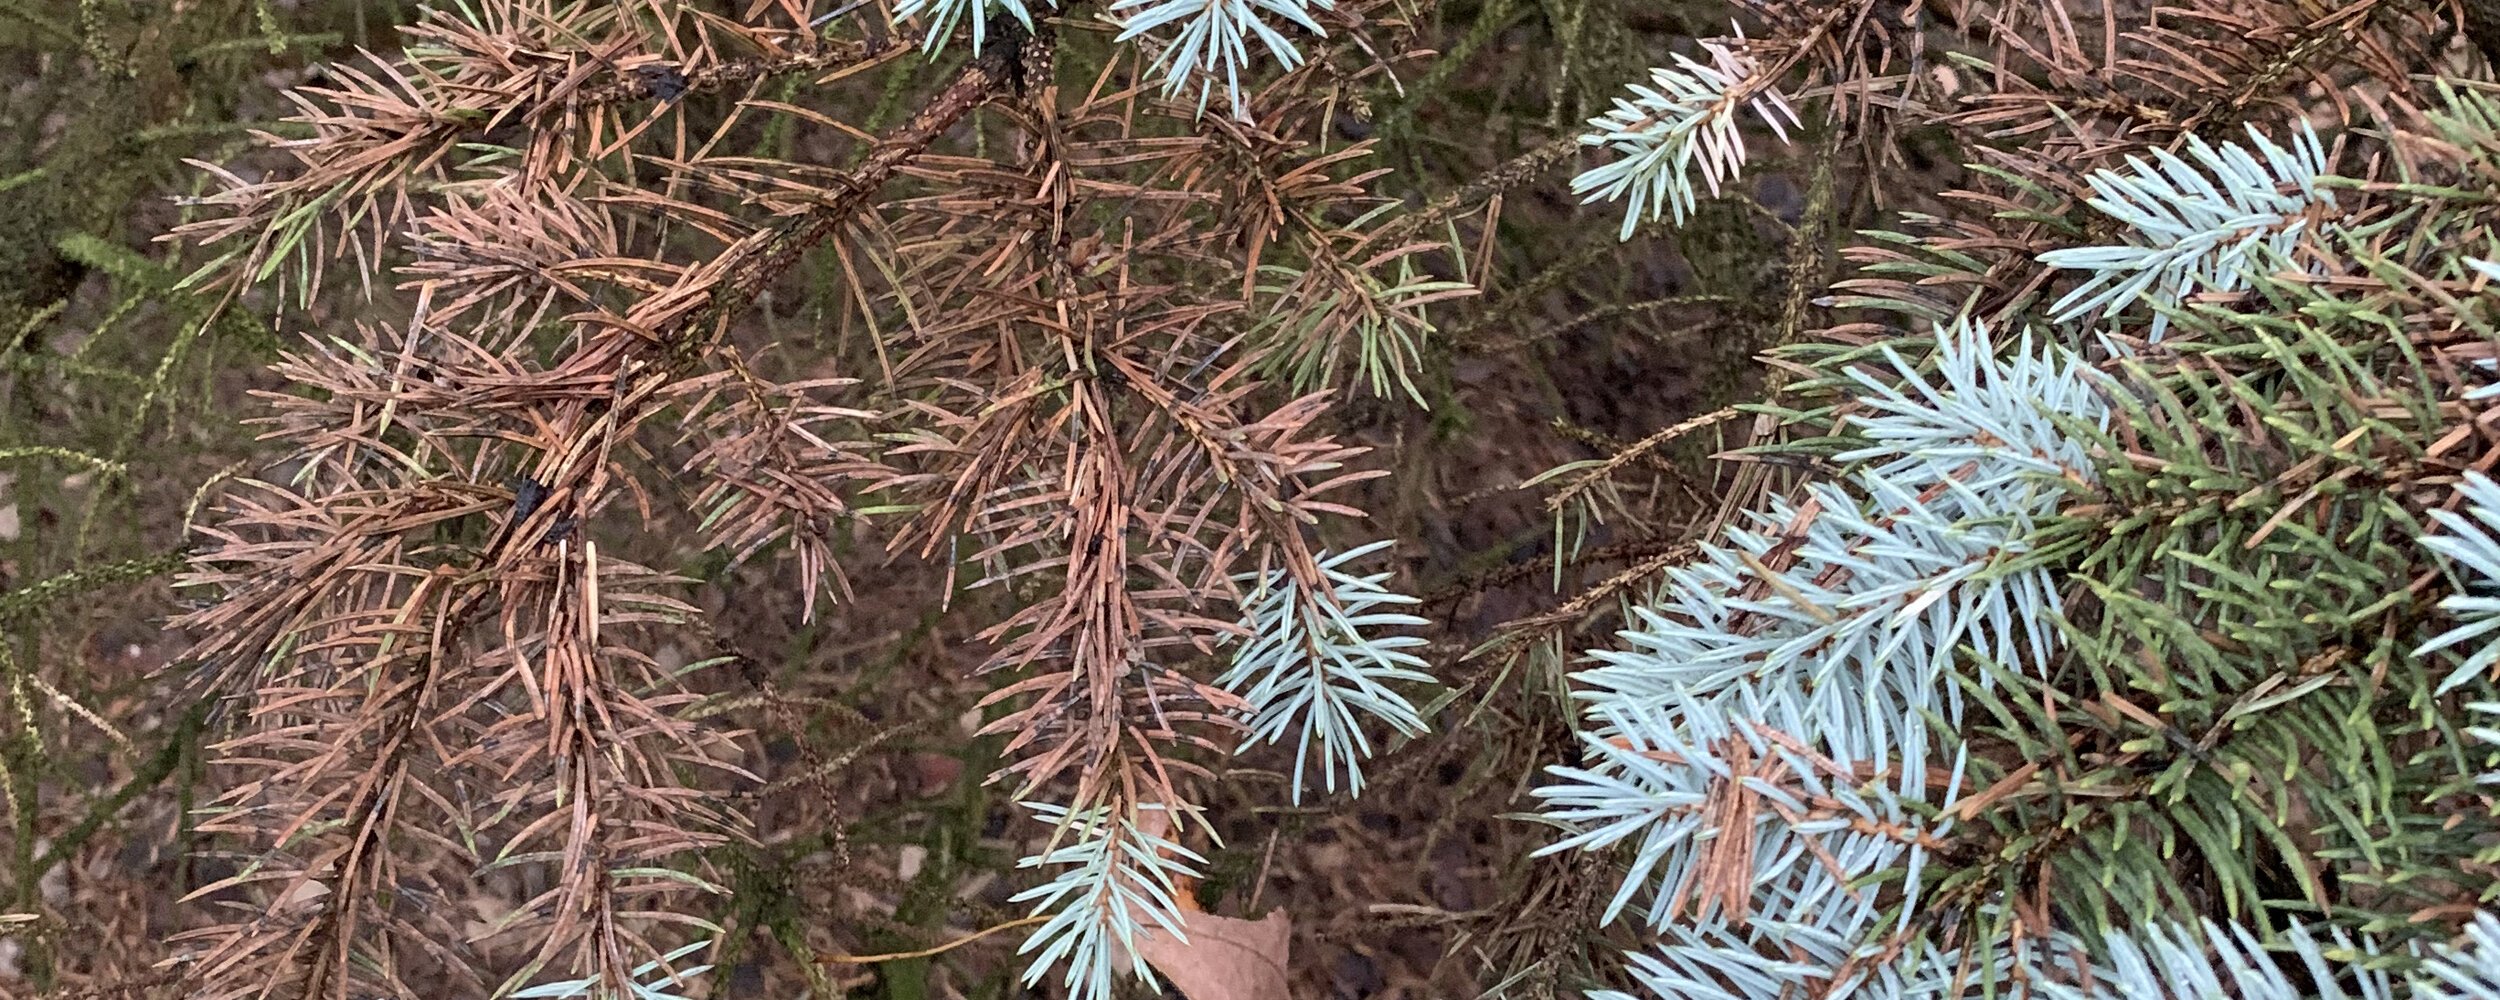
Purple-ish brown needles

Rhizosphaera needle cast poses a significant threat to the health and vitality of coniferous trees, particularly Colorado blue spruce. By understanding the causes, symptoms, and management strategies associated with this fungal disease I hope that you will, as a Colorado blue spruce owner, help keep these beautiful trees healthy. Through a combination of cultural practices, chemical controls, and preventive measures, it is possible to mitigate the impact of Rhizosphaera needle cast and preserve the beauty and ecological value of our coniferous forests and landscapes. Please reach out to Russell Tree Experts if you suspect your trees are infected or need advice on proper maintenance as our ISA Certified Arborists® (myself included) are happy to take a look! Have a happy summer and we look forward to helping you with your trees!

Sincerely,

Mike Wilson I Regional Manager, Russell Tree Experts
Mike joined RTE in 2013 and has been in the green industry for over 14 years! He is an ISA Certified Arborist® and a graduate of Oregon State University. Mike is an outdoor enthusiast and a US Army Medic Veteran!


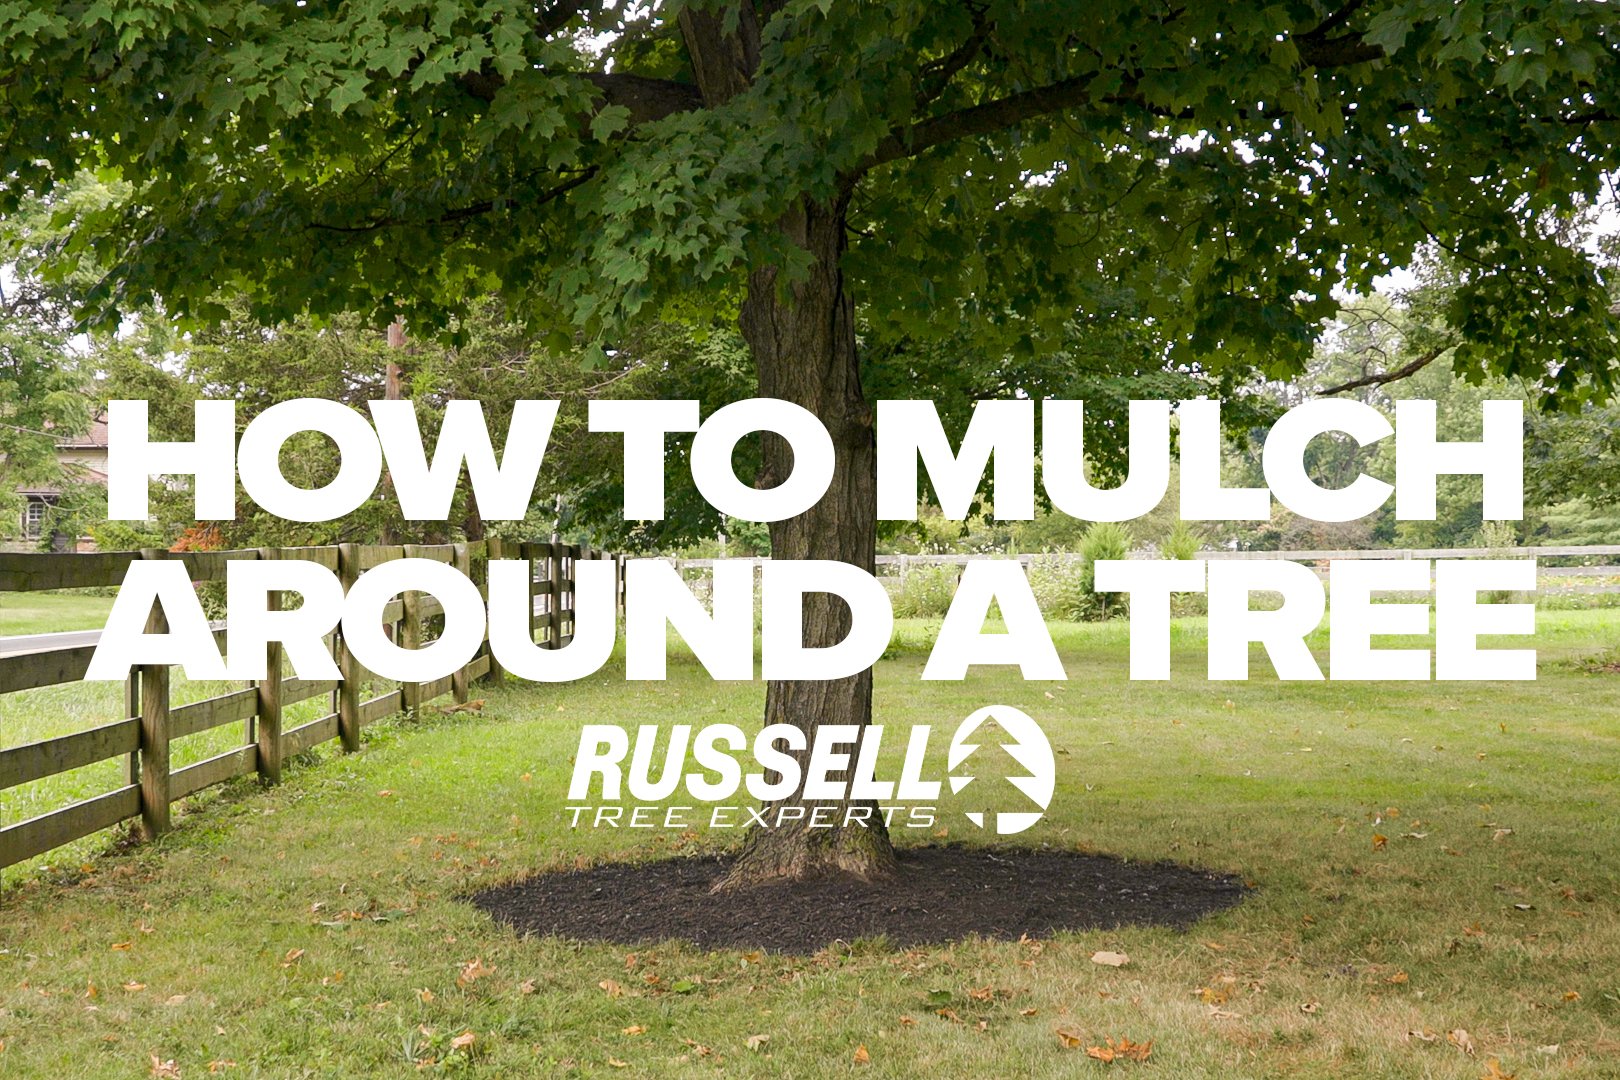
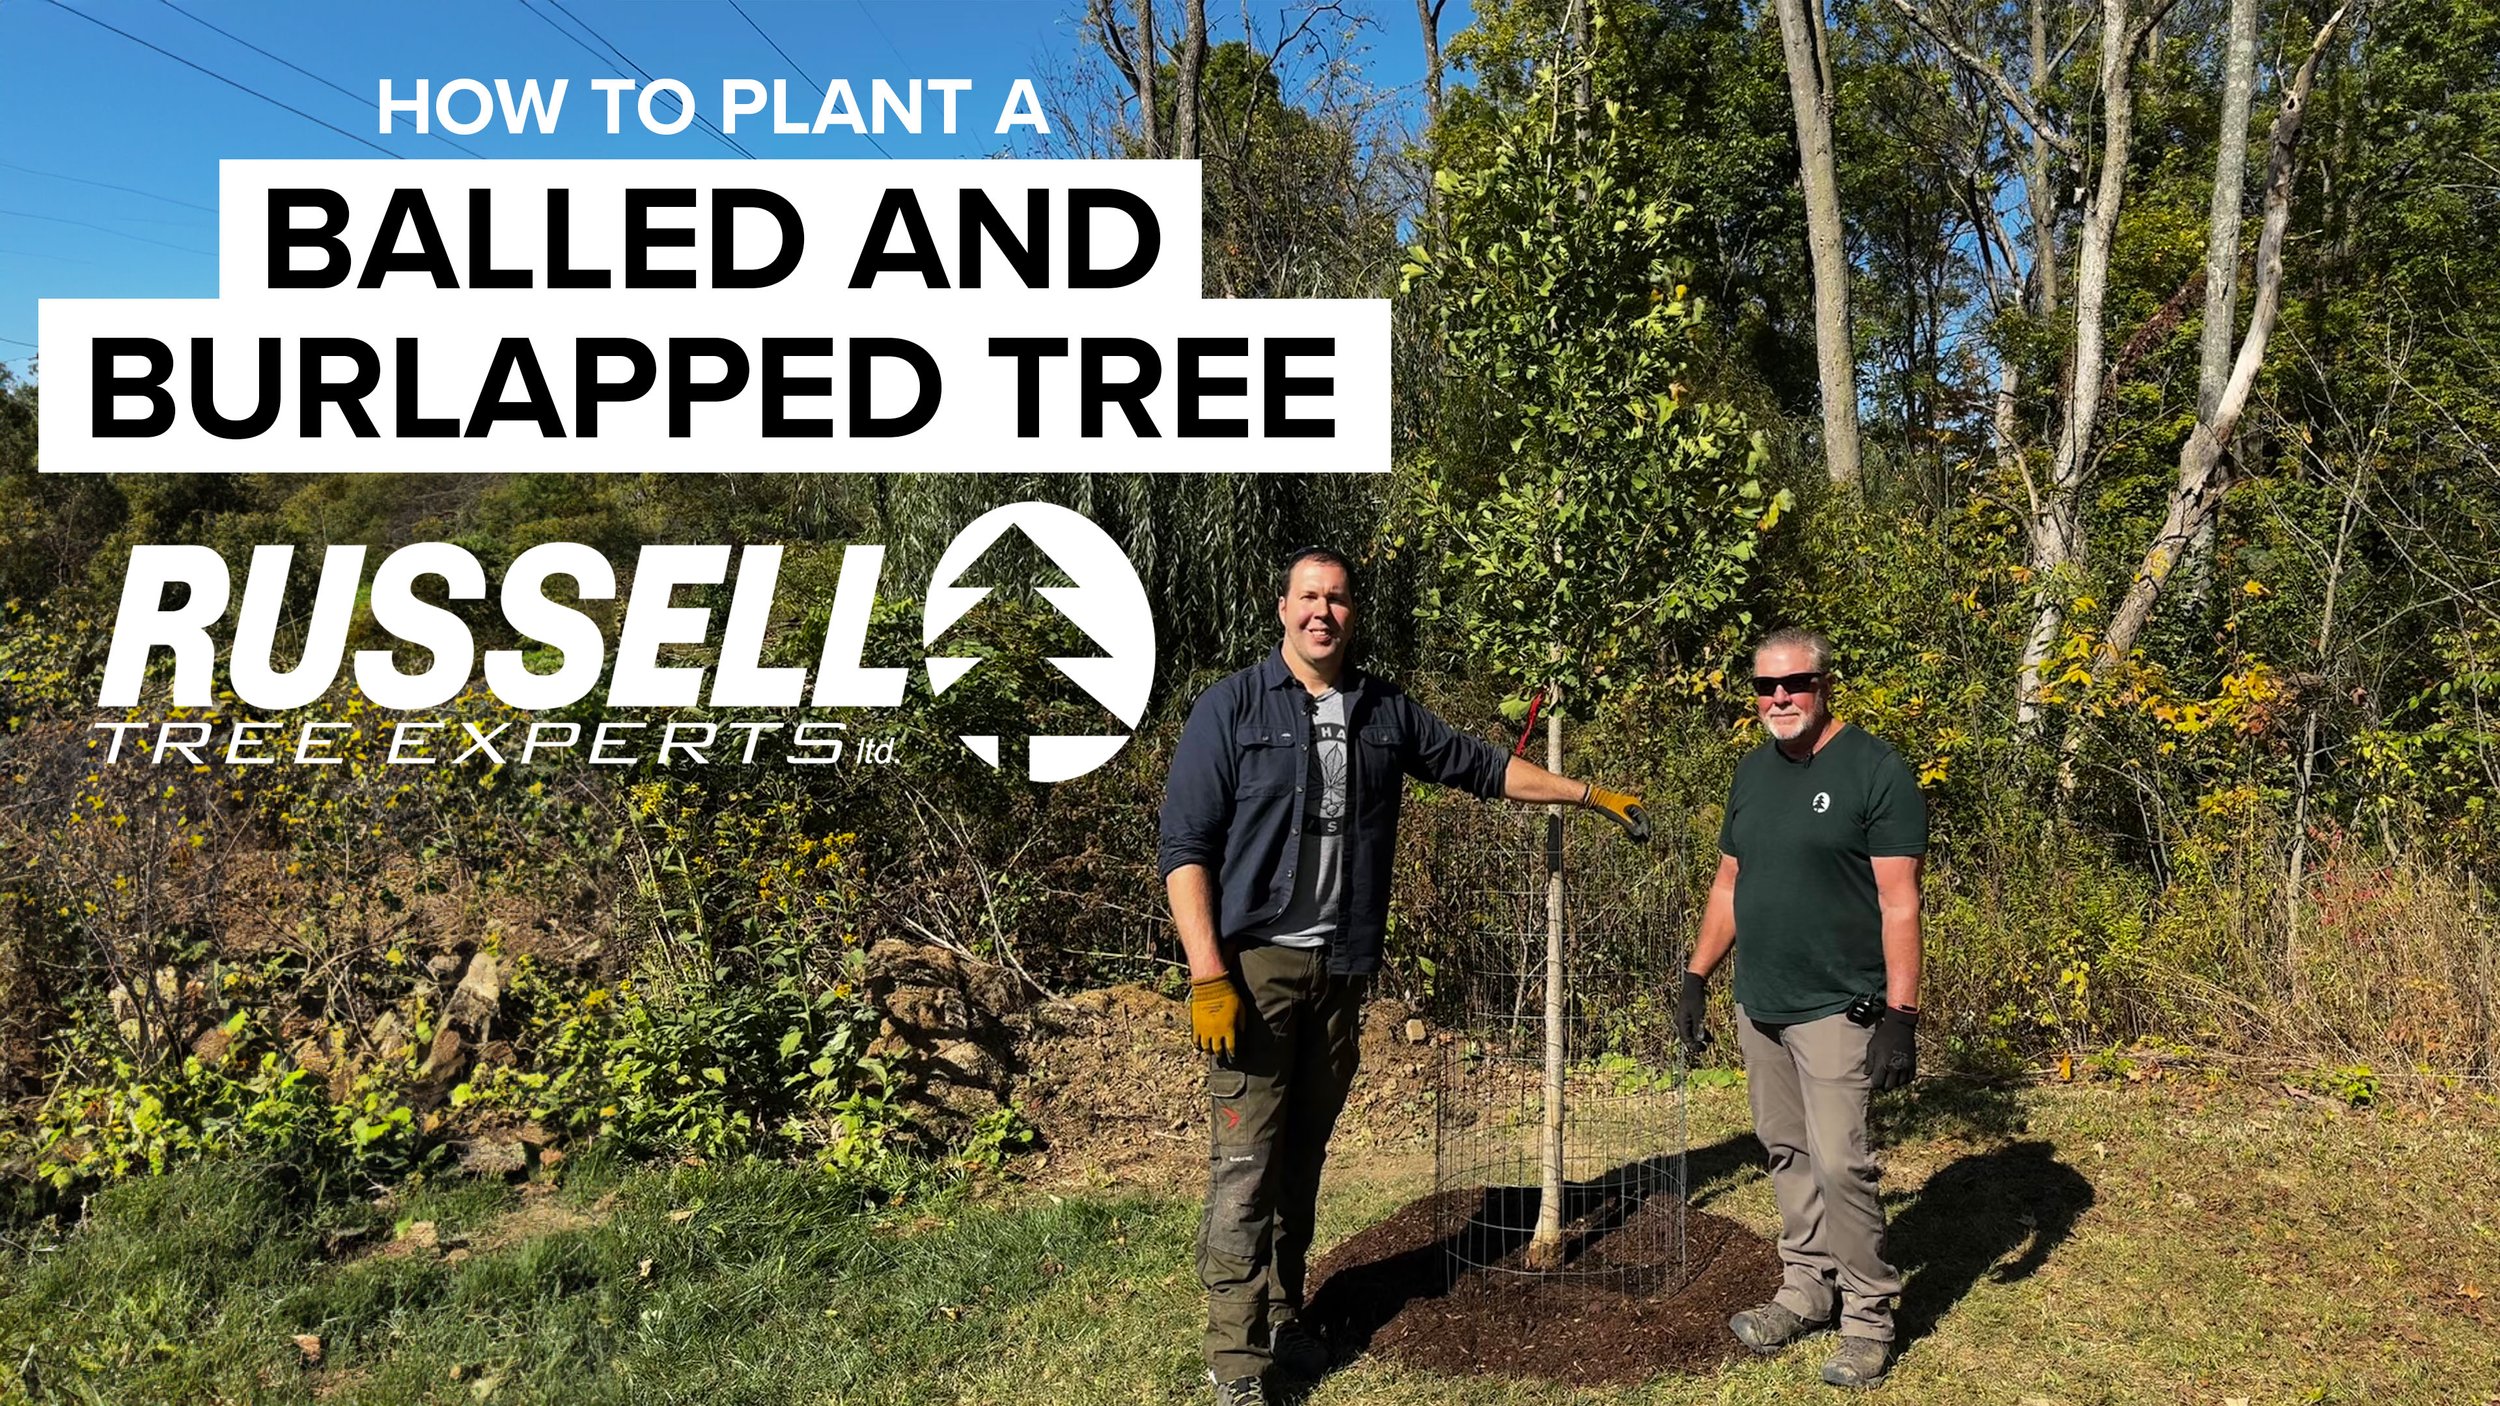
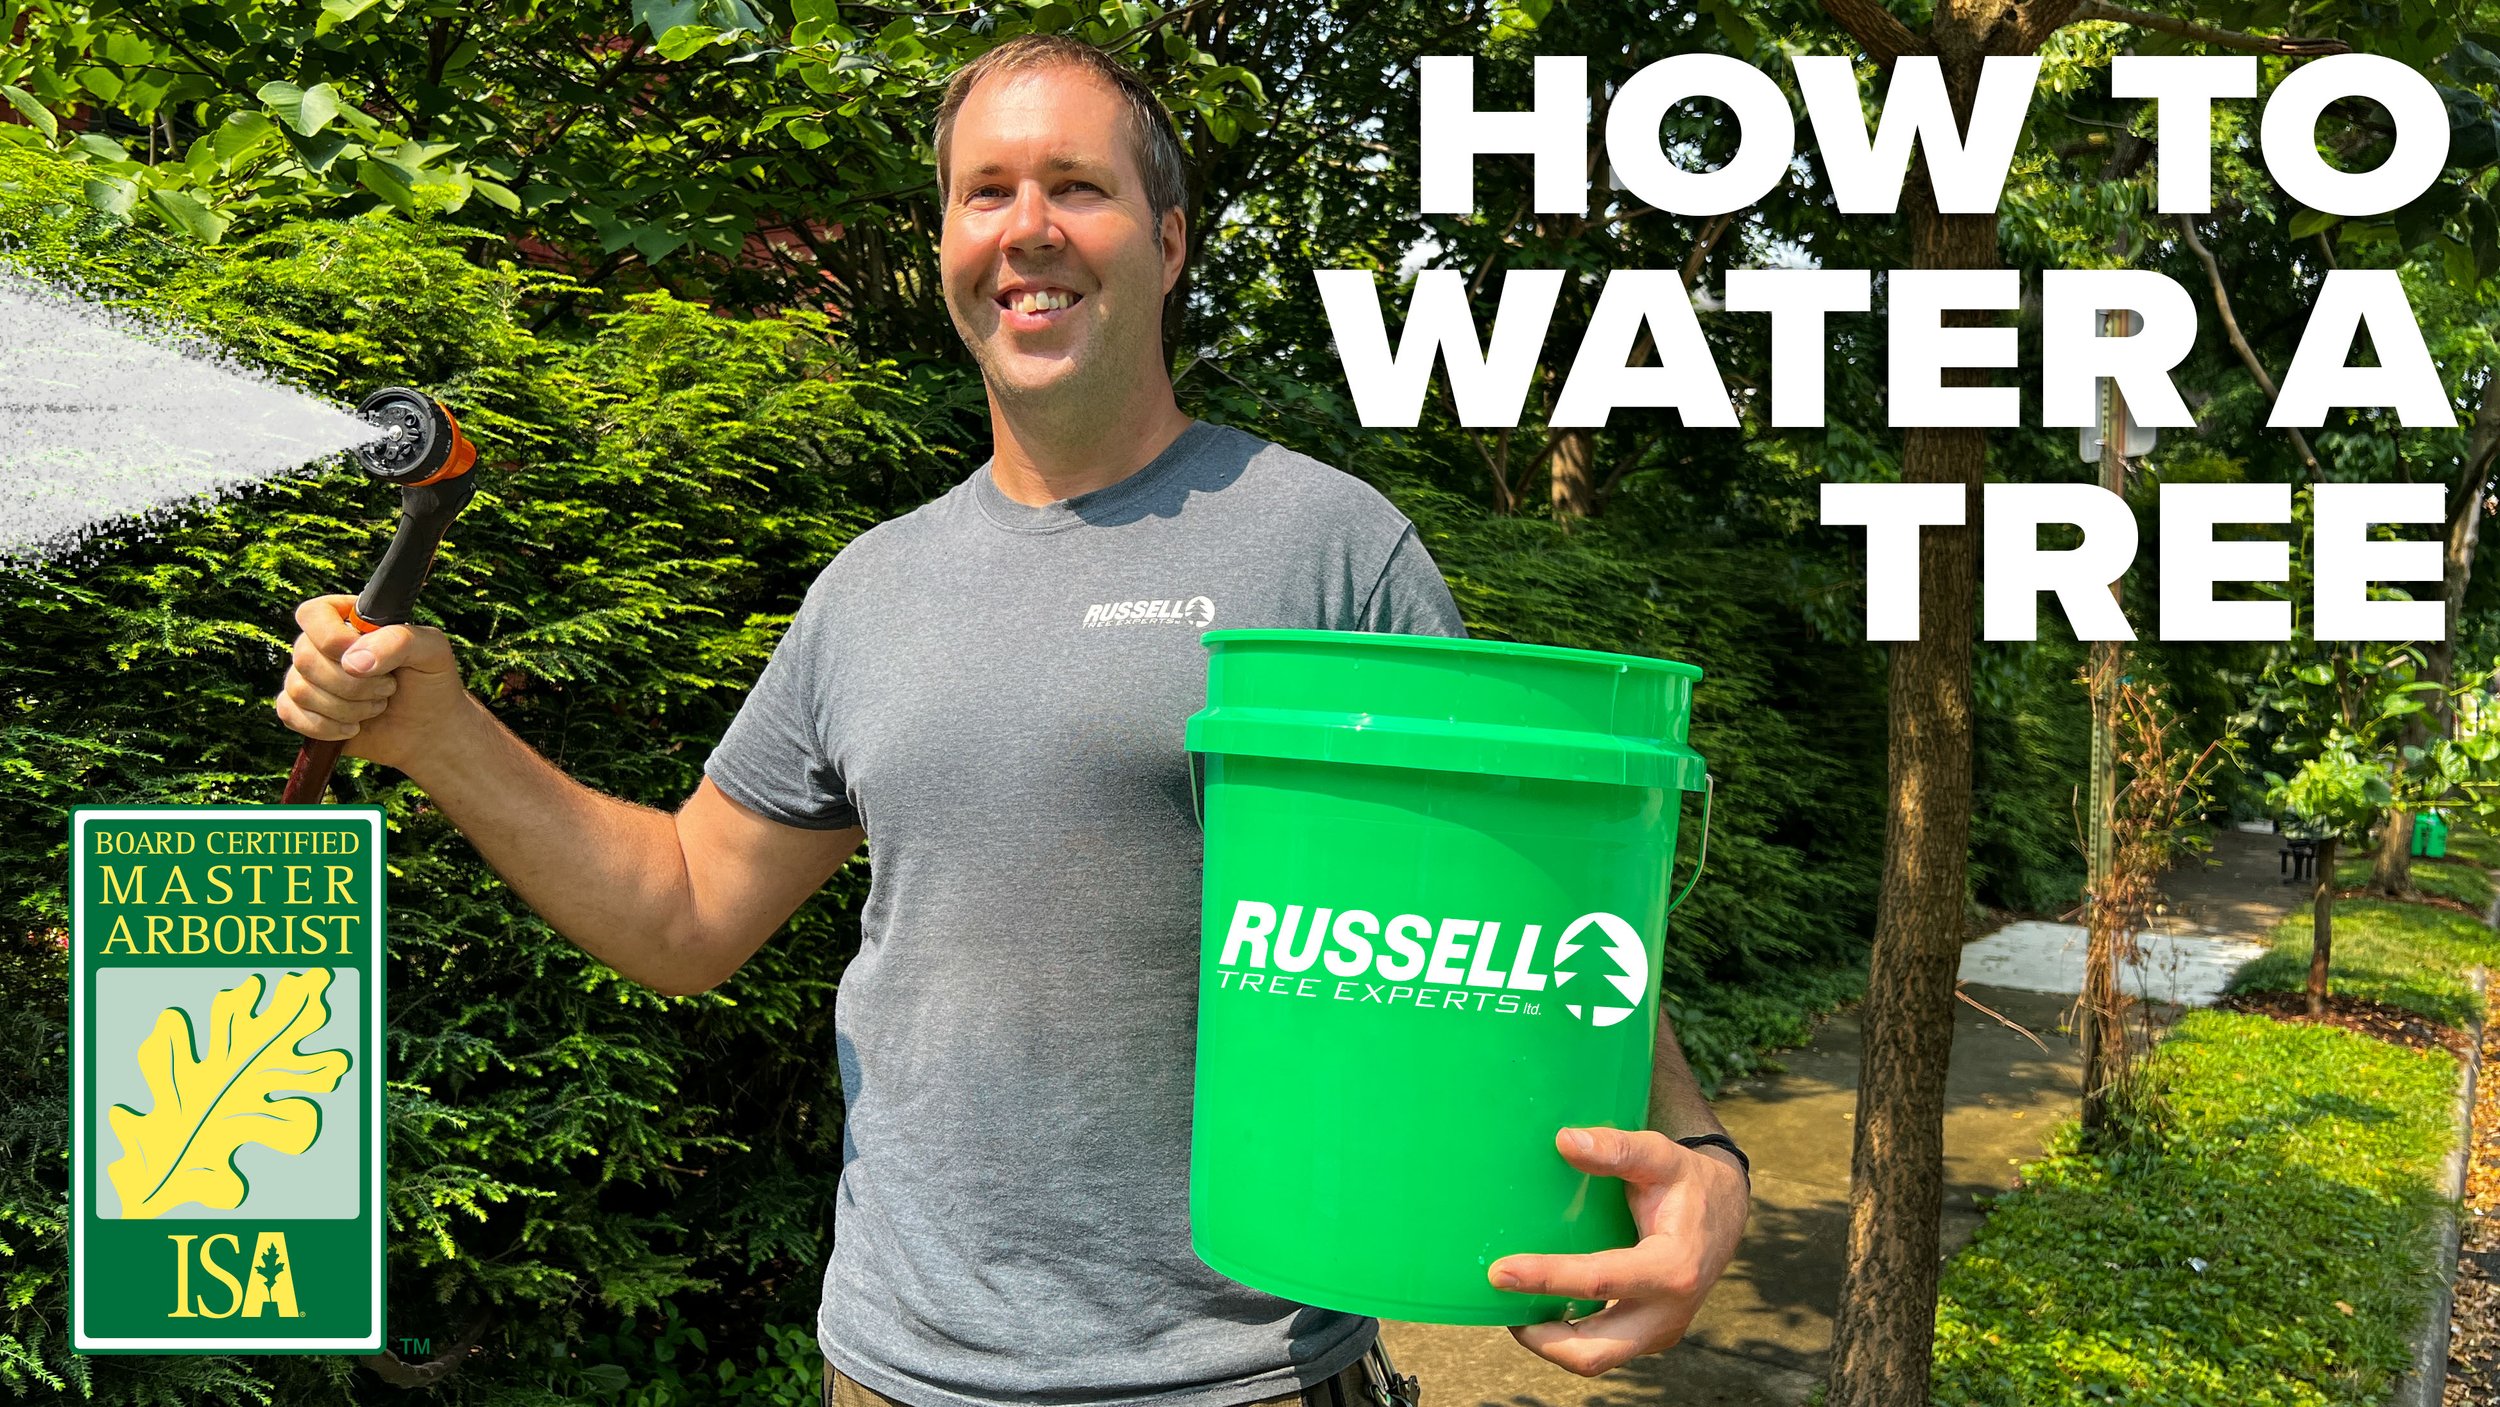
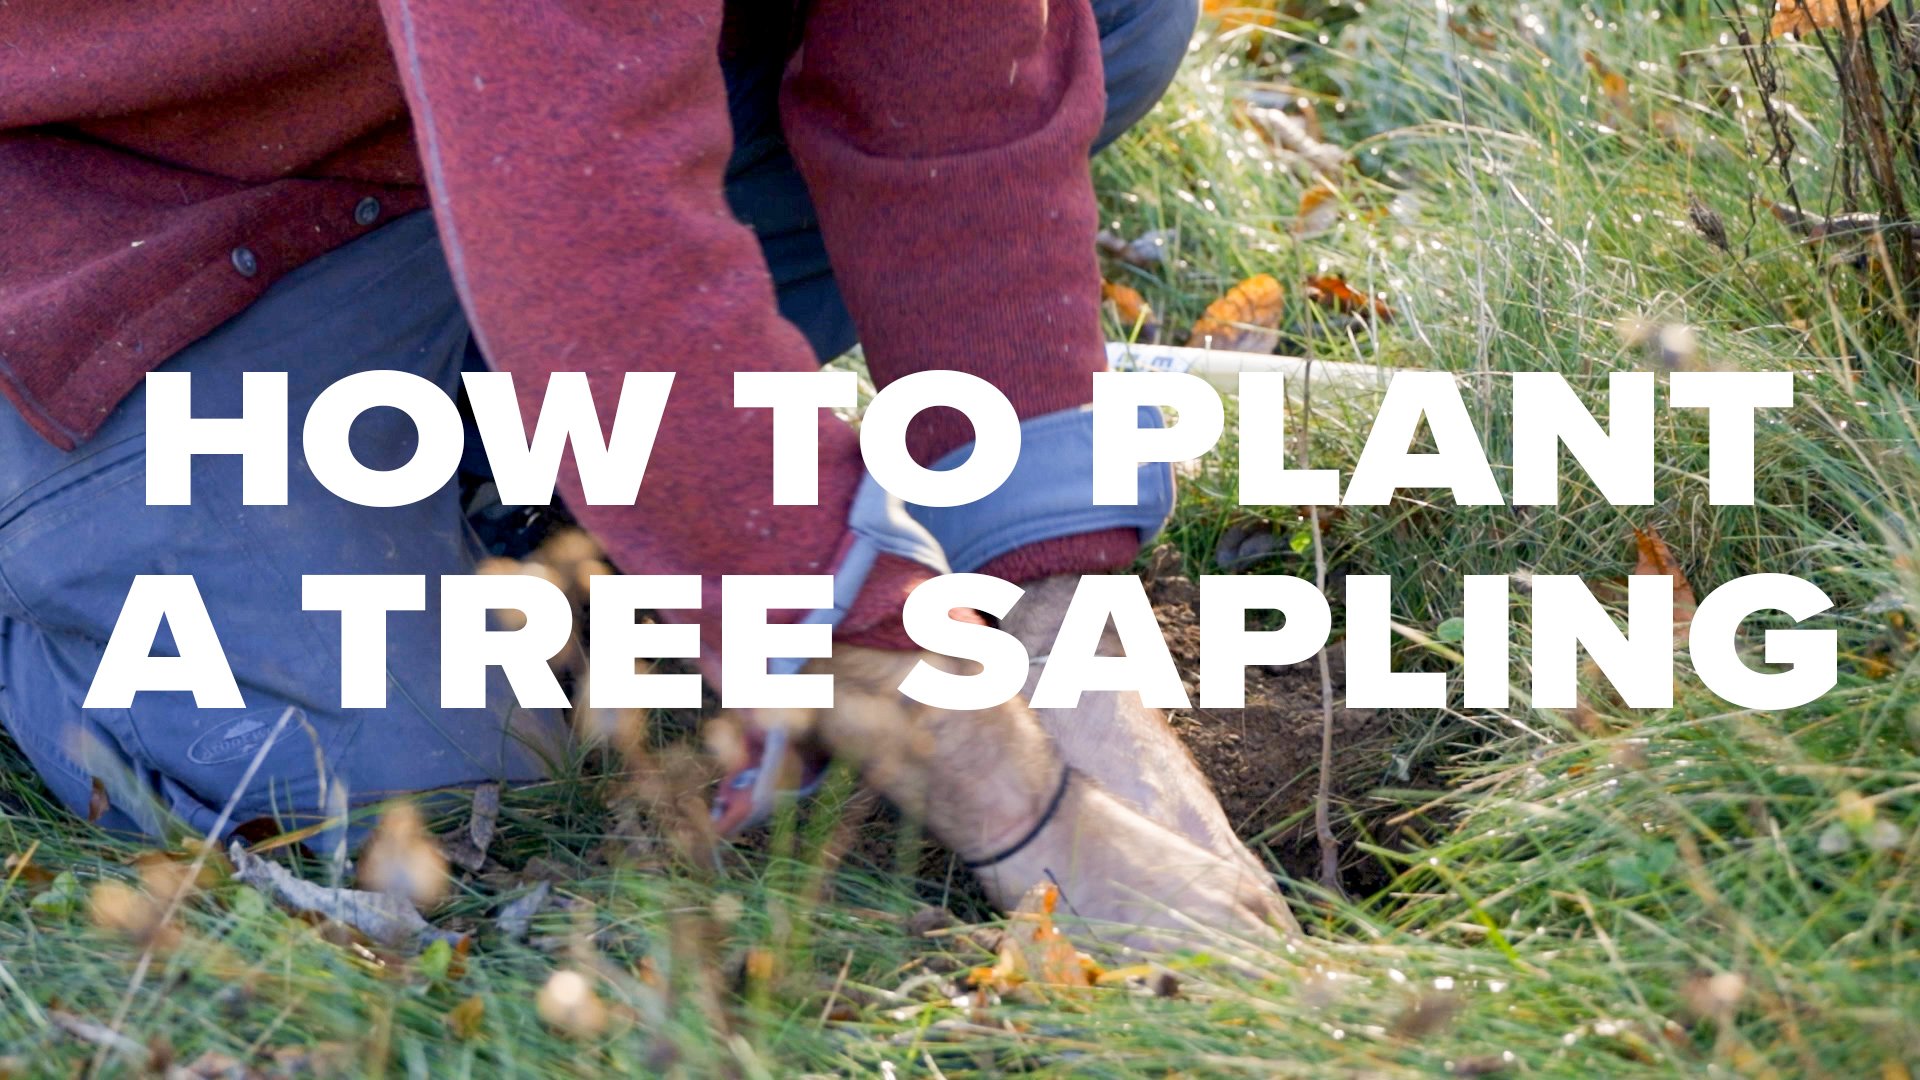
Check Out These Tree Preservation Videos!

Additional Tree Preservation Articles!

The Root of Many Plant Problems in Central Ohio: Soil pH

By Walter Reins
ISA Certified Arborist
April 25, 2024​

You’ve probably heard the term pH. You may even think “I know this one - it means something is either acidic, neutral, or alkaline”, and that wouldn’t be wrong. But what does that mean and why does it matter? What determines the pH of soil, water, or even the human body? Like the periodic table of elements, pH may be something that reminds you of high school chemistry class, something you’ve filed away under the “when am I ever going to use this?” section of your brain, long ago forgotten and collecting dust ever since it was put there. While pH is far from being an endorphin-producing topic, it does significantly influence plant growth and overall health in your landscape. Let’s discuss the role that soil pH plays in nutrient availability, soil chemistry, and even microorganism activity, and why it matters for your plants.

pH and How It’s Influenced

pH stands for “potential of hydrogen”, and is a measure of the acidity or alkalinity of a solution, ranging from 0 to 14 with 7 being neutral. A value below 7 is considered acidic while a value above 7 is considered alkaline (or basic). This scale represents the concentration of hydrogen ions present, with acidic solutions having a greater number of ions and alkaline solutions having fewer ions. In soils, that concentration of hydrogen ions is influenced by things such as the parent rock material that originally formed the soil, human activity, climate, and the presence or lack of organic matter. In turn, the resulting pH will influence the availability of nutrients essential for plant growth, microbial activity that helps with nutrient absorption, and soil chemistry that influences the breakdown of soil particles into more usable forms. Of the influencing factors mentioned above, parent rock material and the presence or lack of organic matter often go hand in hand and are the most significant influencers in our central Ohio landscapes. Central Ohio largely consists of limestone bedrock, which naturally has a higher pH than what’s preferable for most plants. So you might ask “Well, how is it then that any plants can be healthy and thrive in central Ohio?”. The answer is organic matter. In an undisturbed, natural environment like the forest, years and years of organic matter have formed on top of the infamous “Ohio clay” subsoil that we encounter in our backyards. The source of this organic matter comes from falling leaves, dead branches and trees, and dying organisms just to name a few, that collect on the forest floor year after year, decade after decade. These are all things we tend to remove from our landscapes to keep them tidy, which results in a lack of organic matter formation over time. For more on how to address this topic, check out our Arbor Ed article “Leave those Leaves!

Nutrient Availability

Chlorosis in a pin oak tree in Bexley, Ohio

pH influences the availability of essential nutrients in the soil by changing their level of solubility. This simply means that pH will determine whether or not these nutrients are in a form that can be absorbed by the tiny roots and roots hairs of plants. Most plants will prefer growing in soil with a pH range between 6-7, slightly acidic to neutral. When the pH is out of its optimal range for a particular plant (generally too high in central Ohio), the plant’s growth may slow, it may lose overall health and vigor, or conditions like chlorosis can develop because that plant isn’t getting the nutrients it needs to carry out essential functions for growth. Chlorosis, or yellowing of leaf tissue, is a very common condition in central Ohio and can be seen most often with trees like pin oak, red maple, white pine, and river birch. It’s interesting to note that these are trees that are either native to Ohio or an adjacent region. In their natural habitats where organic matter is abundant, soil pH is lower and nutrients are readily available for uptake. The parent material, derived from limestone and having higher pH levels, does not affect the trees since the absorbing roots are largely growing in the organic layer above it. In our backyards however, carpeted with lawn but cleared annually of leaves, higher pH levels can quickly cause issues even with otherwise healthy trees.

Chart showing availability of essential elements at various pH levels

Microbial Activity

pH affects the activity of microorganisms in the soil. These microorganisms are essential for plant health, helping plants to absorb certain nutrients, or aiding in the breakdown of organic matter into available forms for your plants. Certain fungi, bacteria, or insects that benefit a particular plant will naturally thrive in the same pH that is ideal for that plant. Encouraging the proper pH for your plants in turn helps to foster a healthier population of these important helpers in the soil. In the same way that our own bodies are influenced by the health of our gut bacteria, plants rely on microbial activity in the soil. Without it, they can struggle to carry out essential functions for proper growth and overall health.


Soil Chemistry

Similar to nutrient availability, pH can affect the chemistry of the soil and determine whether or not the available nutrients will be absorbed by roots. It also influences the composition of the soil, helping certain minerals to break down into smaller molecules, ultimately affecting the charge of soil particles and the ability for the soil to hold on to essential elements that could otherwise be removed from the soil. A good example of this would be a soil’s ability to retain certain nutrients by preventing them from getting washed out of the soil by irrigation or rainfall. Acidic soils tend to be better at retaining more of these charged nutrients. It's no coincidence then that most plants prefer acidic or slightly acidic soils, as the lower pH makes those soils richer in nutrients and more “user friendly” for plants.

 ~

Soil pH plays a significant role in the overall health of trees, shrubs, and other plants in our landscape. A little bit of knowledge can go a long way in helping to understand the unique issues you may have in your central Ohio landscape. Below is a list of a few things you can consider in determining what’s best for your yard.

  • Have a soil sample from your yard submitted for analysis to help determine if there is a pH issue or nutrient deficiency.

  • If you know that you have higher pH levels, consider planting trees and shrubs that are more tolerant of alkaline soils.

  • Try incorporating more organic matter into your soil by allowing leaves to decompose in landscape beds over the winter, and consider enlarging groundcover or mulch beds around trees (less lawn)

  • Have root zone invigoration work done for trees that are struggling with nutrient deficiencies and/or soil compaction.

  • Apply pH lowering products to landscape beds with particularly sensitive trees or shrubs (note that this is something that generally needs done annually, as permanently lowering the pH of soil with additives is next to impossible).  

As always, our ISA Certified Arborists are happy to help and you can contact us for any questions, issues, or inspections!

Additional Tree Preservation Articles!

Sincerely,

Walter Reins I Regional Manager, Russell Tree Experts

Walter became an ISA certified arborist in 2003 and has a degree in landscape horticulture. He has 25 years of experience in the tree and landscape industries and originally began working at Russell Tree Experts in 2011. Walter is also the owner/operator of Iwakura Japanese Gardens, a small design/build/maintenance firm specializing in Japanese-style gardens, and also offers responsible tree planting for all landscapes.

Right Tree, Right Place!

By Mitch Lippencott
ISA Certified Arborist
April 11, 2024


Much of the tree work our arboriculture division at Russell Trees Experts performs is a direct result of trees and shrubs being planted in inappropriate locations.

When we prune trees to clear a house, roof, or utilities, it's often because a large tree was planted too close, or a smaller tree should have been used. When we shear shrubs to stay below windows or to not encroach on walkways, a smaller, narrower shrub would not have needed maintenance. When we repeat micronutrient fertilizations or fungicides, it's usually to support a tree that doesn't belong in its environment. In short, we make wrong trees fit in wrong spaces.

The unfortunate fact is most trees and shrubs need a specific set of conditions to thrive - they can't just go anywhere. While figuratively forcing square trees in round holes is good for our business, the savvy gardener will not pick out a tree they 'like' and plant it in a spot where they think it 'will look nice'. Instead, they will study the conditions of their site, then choose the tree that best fits those conditions.

So how can you, the savvy gardener, 'study' your planting site? It's more than looking out the window once. Measuring is a good idea, but still not enough. Instead, examine your area from multiple vantage points, during multiple weather conditions, and multiple times of day.

Does rainwater pool anywhere? Where does the sun hit, and for how long?  Which direction does the wind come from? Where would privacy be preferred? These, and many more questions should be incorporated into the plan.

While this seems cumbersome, the process can be broken down into five important factors: size, water, soil, exposure, and goals.

1) Size

Yes, plants can be pruned to keep them smaller, but most don't want to be! Severe pruning and shearing can cause stress, which in turn, makes plants less capable of defending themselves against diseases and insects; especially near a house or patio. Research plant sizes and don't get greedy - if a plant gets too big for your space, it's out of contention.

2) Water

As the global climate continues to change, Ohio is experiencing warmer, wetter winters and springs. Few plants can tolerate both wet and dry conditions. So if your area is wet most of the year, only water-loving plants should remain in the candidate-pool. Forcing dry-footed plants to wet soils will likely leach away vital nutrients and cause fungal infections. Conversely, heavy drinkers in dry soils will likely need continuous watering, which is time-consuming, expensive, and environmentally careless.

3) Soil

Soils vary greatly by location, but in general, central Ohio soils have a heavy clay texture with poor drainage, and a neutral pH (neither acidic, nor alkaline). Undisturbed soils tend be more loamy and acidic. New builds and urban areas tend to be more compacted and alkaline. Plants in soils not matching their needs can suffer from fungal infections, nutrient deficiencies, and instability due to poor root growth.

4) Exposure

While sun and wind are obvious factors, deer-resistance, salt tolerance, limited root space, planned or recent construction, and known insect pests or pathogens are other common exposures in our region.      

5) Goals

I will discuss this more thoroughly in a future article because this is the most fun part - this is where all of your research and observation pay off and your plant starts to work for you! Privacy, traffic noise reduction, food production, bird watching, and a created, desired aesthetic are all examples of good planting goals. Luckily, there is a plant for every size and for every site, so be diligent and find exactly what you need. Scott Zanon's excellent guide Landscaping With Trees in the Midwest lists trees for a variety of situations, including photos, plant sizes, and recommended cultivars.

~~

Pairing the correct plant to the correct location may take time and research, but it is the best path to a long-lasting, low-maintenance garden. When planting your next tree, thoroughly observe your site before heading to the nursery, then limit your search to the trees that match those conditions. Just don't get too carried away - we still have a business to run over here! ;-)

ADDITIONAL TREE PLANTING RELATED ARTICLES!

videos on tree planting and watering!

Sincerely,

Mitch Lippencott I Regional Manager, Russell Tree Experts

Mitchell Lippencott joined Russell Tree Experts in 2020 and has been in the green industry for over 20+ years with a diverse background ranging from working for a landscape design company, a retail garden center, and two municipalities! Mitch is an alum from The Ohio State University, a licensed pesticide applicator, a qualified tree risk assessor, and an ISA certified arborist. Outside of work, he enjoys traveling, cooking, and gardening.

How and When to Stake a Tree

By Walter Reins
March 20, 2024

“Spare the rod, spoil the child” — This is how I like to explain the staking of trees when someone asks about it. Sometimes the quote works, and other times they look at me funny. While it doesn’t do much to explain how to stake a tree, it’s actually a great way to think about why you may or may not want to stake the tree in the first place. Stick with me and I’ll explain.

For starters, I’m not condoning corporal punishment. Maybe you’re familiar with this somewhat outdated expression. To put it in different words, it could mean “Without discipline, a child doesn’t receive the guidance to grow up strong and self-sufficient.” That sounds better, doesn’t it?! Don’t make the mistake of equating the “rod” to the stake, it’s actually the opposite. The rod in this case represents “discipline” or "hard love.” In other words, not staking the tree if you don’t have to. If that doesn’t make sense yet, it will in a couple of paragraphs.

There are a few situations where staking a tree is beneficial or even crucial to its success. But for the majority of newly planted trees, it’s often not necessary. Let’s start with reasons to stake.

When Staking a Tree is a Good Idea

  1. An existing or newly planted tree that is “loose” at its base due to wind or improper handling when planted. Trees with trunks that can move around in the soil, even a little bit, are at a greater risk of further damage, lean, or complete failure (uprooting/falling over). Temporary and sometimes long-term support may be necessary to stabilize the tree for its own health and also safety.

  2. Newly-planted LARGE trees. These trees often have a much larger canopy-to-rootball ratio, and as a result, are at greater risk of shifting or blowing over from high winds after being planted. They also tend to take longer to re-establish a strong, supportive root system.

  3. An existing tree that is exhibiting a lean due to being located in an area with frequent high winds, or a newly planted tree in this same area.

  4. Same as number 3 but substitute high wind with frequently wet soil.

  5. A newly planted tree being placed on a steep grade or significantly sloped terrain. 

    Note: The above list does NOT say to “stake all newly planted trees, period.” Let’s revisit the expression at the top of the page to understand why. 

Why Staking a Tree is Often Not Necessary

Trees respond to their environments in some pretty fascinating ways. One of those is by changing the amount and quality of tissue that is grown in response to physical stressors (wind, gravity, lean, proverbial rods, etc.) We can call this geotropism (change in response to gravity) or thigmomorphogenesis (change in response to any mechanical or environmental stimulus). Jeopardy, here we come! When we plant a new balled and burlapped tree, many of (most of) the tree’s original root system was lost when it was dug out of the ground. In the case of containerized trees that have all of their root system still intact, that root system is concentrated into a very small space (within the container) and isn’t spreading out into the surrounding soil, at least not at first. In either case, research has shown that trees will often develop a stronger root system, in the long run and under normal conditions initially, when left unstaked and made to withstand these forces. The jostling and moving about that occurs with a newly planted tree in light to moderate winds, or the forces of gravity placed on a tree that has to overcome a slightly sloped terrain, will actually stimulate growth of the root system, much the same way our muscles will grow in response to first being stressed in a workout and technically damaged, but then recovering bigger and stronger than before. To further build on that analogy, that same response can be impacted by other factors, just like in people, like overloading (damaging high winds for a tree/a person trying to lift too much in the gym) or lack of proper nutrition (which impedes proper healing and growth, whether you’re a tree or a person). Under normal conditions, a tree will strengthen its root system and eventually be able to withstand greater forces exerted on its ever-growing canopy.

We’ve discussed when a tree should be staked, and when it shouldn’t. Now let’s talk about how to properly stake a tree when it’s deemed necessary. For the purpose of this article, I’m going to refer to two different types of support as “staking”. This includes actual staking, but also guying. When staking a tree, the materials used and where/how they are installed are very important.

The Stake

For smaller applications, wooden stakes or metal posts may be driven into the ground around the tree, just outside of the root ball (1-2’ form the trunk) or up to a few feet away if conditions require it (space restrictions can sometimes dictate stake placement). Stakes can commonly be 5-6’ in length and driven 1-2’ into the soil, depending on the structure of the soil and how easily it may loosen over time. They can be driven into the ground upright or at a slight angle away from the tree to compensate for the slight pulling forces, towards the tree, that they’ll be subjected to. Use a pole/stake pounder or a sledge hammer to drive the stakes into the ground. It might help to employ a second person for this - best to let them hold the stake. Like trying to swat a fly on someone’s head, it is always better to be the one swinging and not the one being swung at! The number of stakes or posts around a tree can vary, depending on the environment and reasons for staking. A tree subjected to frequent winds always coming from the same direction may simply need one stake upwind from the tree to prevent it from leaning or blowing over in the direction of the wind. A tree in the center of an open backyard, subject to wind from all directions, would do better with 3 stakes, placed in a triangle pattern, to support in all directions.

For larger applications, guying a tree with metal ground anchors may be a better option. A guy wire typically runs from a strong anchor point on the tree down to an anchor inserted in the ground. These are augur-type anchors that turn into the ground and provide an attachment point for wire running from the anchor to the tree. Turnbuckles can be used in these situations to achieve the proper tension on the wires if they’re supporting a tree of significant height and/or spread. This application is rarely something to be undertaken by a homeowner, and is usually performed by a landscape company as part of the initial installation of the trees. However, a homeowner may choose to implement this setup if adding support to an existing established tree that is starting to exhibit a lean due to winds, a damaged root system, or saturated ground (Caution: If you have any doubt as to the stability of a substantially sized tree that appears unstable, do not attempt to remedy it yourself. Call a professional tree care company and have the tree assessed immediately). 

The Wire or Strap

There are a number of materials that can be used to connect the tree to the stakes, but no matter what it is, one rule should always be followed - it shouldn’t damage, cut into, or compromise the tree’s branches or bark in any way. Wire remains a cheap and effective material to use, but it’s crucial that it not be directly wrapped around the tree. This will cut into the bark and possibly girdle the stem where it makes contact. Instead, short sections of old garden hose can be cut and used, with the wire running through them, to provide a soft and wide surface to make contact with the trunk of the tree. Straps or rope, if used instead, should be wide enough that they do not cut into the bark. Thin-barked trees such as Red Maples are extremely easy to damage if improperly staked. There are of course many store-bought, application-specific options to choose from that can work wonderfully and provide the right support. Whatever material you are using, the tension between stake and tree does NOT need to be extreme, and should instead be appropriate for the environment. Just enough to prevent excessive movement is usually appropriate. Strong winds or a tree with a larger canopy will call for more tension. Imagine Hippocrates planting this tree and, “First, do no harm.”

Illustration of a recently planted tree with three stakes secured with wire [click to enlarge]


A few more points

There are a few more points worthy of mention. If you determined that a tree needed staking, and after having successfully staked said tree, consider the following: 

  • Check the tree regularly. Every couple of weeks, check to see if the stakes have shifted or loosened in the ground. Check the portion of the support wire or straps that wrap around the tree for any signs of rubbing or wear that could potentially compromise the bark if left as is. Adjustments in tension or placement of support may be necessary.

  • Remove the stakes after a year. Generally, one full year of root growth and settling of the soil is sufficient to anchor the tree in place and provide adequate support, under normal conditions. Leaving stakes for longer than this can adversely affect the tree’s ability to adapt to its environment.

  • Fertilize the tree for the first several growing seasons. A growing tree will use all the nutrition you can throw at it (responsibly, left-over Timbits don’t count!). Fertilizing a new tree encourages root and shoot development by providing essential nutrients often lacking in our urban landscape soils. A properly planted, staked as-needed, and well-fed tree is on its way to providing many years of benefit to the landscape.

HOW-TO GUIDE

Click below to download the step-by-step guide!

A Note about Evergreens…

There’s one more application of staking that you’re perhaps wondering about, and curious why I have mentioned it or discussed how to do it - the staking of evergreens with a diagonal wooden stake strapped against the trunk. I’m mentioning it, but not recommending it. This is a very common way for evergreens to be staked, typically when installed by a landscape company, and a very common way to cause long term problems if forgotten about. In the 25 years I’ve been working in the green industries, I’ve seen countless examples of these stakes having been left in place, forgotten about as the tree put on new growth and concealed the stake and support materials. Out of sight, out of mind. This often leads to a girdling of the main stem (trunk) at the location where the strap or wire was placed, years after planting, and only discovered when the top half of the tree suddenly and “mysteriously” starts to die. If you absolutely must stake a tree in this manner, use natural twine, not any synthetic material to attach the wooden stake to the tree. This will break down after 1-2 years and is much less likely to girdle the main stem of the tree if forgotten about.

Remember, the staking of a tree is unnecessary more often than not. When you or a professional deem it a good idea, proper stake installation with appropriate materials will ensure that the stake benefits the tree and causes no long term harm. Please note that Russell Tree Experts does not offer the planting or staking of trees, but is always happy to provide professional advice for all things tree and shrub related. Contact us with any questions you have about your trees and landscape.

Walter Reins I Regional Manager, Russell Tree Experts

Walter has been an ISA Certified Arborist since 2003. He graduated from Montgomery College in Maryland with a degree in Landscape Horticulture, and has called Columbus, OH his home for nearly 20 years. Walter appreciates trees for their majesty and the critical role they play in our world.

Spring: A Great Time to Fertilize

By Chris Gill
March 7, 2024

Dear Reader,

Spring is a great time to fertilize trees. As the soil begins to warm up, feeder roots become active and begin to look for nutrients in the soil. A general Spring fertilization provides trees with a boost of macronutrients (typically nitrogen, phosphorus, and potassium) which are essential to trees as they enter the challenges of a new growing season and require energy to develop new leaves, branches, and roots. Spring fertilization can also benefit trees recovering from the winter stresses of cold temperatures, desiccating winds, and potential exposure to de-icing products around tree roots. 

At Russell Tree Experts, we fertilize trees through a technique called deep-root fertilization. We perform deep-root fertilization by using a lance to inject liquid fertilizer under pressure deep into the feeder root system in a soluble form that is easy for the tree to take up. This is superior to a traditional surface application where a granular fertilizer is spread over the root system of a tree but still requires time for the product to break down and work itself into the soil. Deep-root fertilization allows nutrients to pass by the competitive roots of turf, weeds, and other ground covers to maximize uptake for the tree. The process of deep root fertilization also helps to loosen up compacted soil around the tree to promote better root growth while also allowing water and oxygen to more easily reach the roots. Compacted soil is a common problem in urban landscapes and can reduce a tree’s ability to access nutrients.

Trees that are showing dieback in the canopy, poor leaf color, stunted growth, or low vigor are all great candidates for fertilization. When putting together a fertilization plan, it is important to also consider tree type and location. Most trees benefit from a general fertilization, but many tree species may require more specific nutrients. Some of these nutrients can be lacking in urban and highly developed environments. For example, many woodland species that grow naturally in low-lying areas (ex: river birch, pin oak, and red maple) often require the addition of manganese to a fertilization program for long-term health and vigor when planted in a residential neighborhood. The specific nutrient for which a tree is deficient may not always be obvious, especially in a young or newly planted tree, but can be determined easily through soil and tissue testing. Russell Tree Experts can provide these testing services as needed.

Trees in native areas are less likely to require fertilization. This is due to the less disturbed nature of the soil and to the natural breakdown of leaves, sticks, and other organic matter continually providing nutrients to the soil or a “natural fertilization.” Trees in urban or highly developed areas are less likely to experience “natural fertilization” due to interference from hardscapes and through regular landscape maintenance practices including raking out yards and landscape beds. 

Soil quality is the key to good tree health and longevity and Spring fertilization is a great way to start the soil improvement process. There are various considerations that are made when selecting a fertilizer for your trees including the type of tree and the location of the tree in your landscape. Consulting with one of our certified arborists can help determine the specific nutritional needs of your trees and get the process started!

Sincerely,

Chris Gill I Regional Manager, Russell Tree Experts

Chris joined Russell Tree Experts in 2015 and has been in the green industry for over 15 years. When not at RTE, he enjoys spending time with wife & son, wakeboarding, and hunting. His favorite trees are the white oak & sugar maple for their beauty and uses beyond the landscape. Chris is an ISA certified arborist, EHAT certified, CPR and first aid certified, holds an ODA commercial pesticide license, and holds a tree risk assessment qualification (TRAQ).

More Tree Preservation Articles!

Root for your Roots!

A tree is only as healthy as its roots. Luckily, Russell Tree Experts offers a variety of root-health services! The powerhouse of our root-health services is the air spade. This tool, when attached to a powerful air compressor, is capable of removing soil without damaging tree roots. (Full disclosure and fun fact: air spading is my very favorite type of tree care to perform!)

Root Collar Excavation

“Say NO to Girdling Roots!”

The most common root-health service is root collar excavation. In this procedure, our technician begins at the tree's trunk and removes soil approximately a foot outwards to reveal the root system closest to the tree. From here, roots that are squeezing the trunk or each other can be selectively removed, thus improving the passage of water and nutrients from the roots to the leaves. Once the soil near the trunk is removed, additional improvements can be made such as removing twine, burlap, or other nursery products left during planting, or correcting the soil depth of trees planted too deep. In my experience, this is the single most beneficial process to long-term tree health. Maples and sweetgums are especially prone to girdling roots. Signs of trunk girdling in other trees include lack of flare at the base (which indicates the tree is planted too deep), flat spots in the otherwise round trunk, early fall color and leaf drop, and excessive stress during summer drought. Root collar excavations should be performed in winter when trees are dormant, but when the ground is not frozen. 

In limited quantities, roots can also be exposed and pruned to prevent damage to patios, driveways, or underground utilities. This method of root removal is far less damaging to tree health than traditional shovel/backhoe techniques. An ISA Certified Arborist® should always be consulted before this type of work is performed because excessive root removal can cause instability and rapid tree death. Air spade trenching and root removal can be performed year-round except in the case of some trees that may be highly stressed or experiencing severe drought conditions.

Even when a tree is planted at the proper depth, has plenty of soil space, and with no girdling, the trunk can still benefit from root-health services. We offer three related, but progressively more intensive options to treat the entire root zone and not just the area around the trunk.

Vertical Mulching

Vertical Mulching

The first is vertical mulching, in which the technician removes soil in small bursts radiating outward from the trunk and extending the entire drip-line of the tree. The small but 8-12 inch deep cavities are then replaced with a porous and nutrient-rich compost blend. The result is a looser, more aerated soil structure for new roots and beneficial microorganisms to expand into. This service can be provided almost year-round (frozen ground/drought excluded) and is my go-to for mature trees on undisturbed sites that are beginning to lack vigor.


Radial Trenching

Radial Trenching

One step up, radial trenching is a similar procedure, but instead of small bursts, the soil is removed in continuous lines radiating outward the length of the canopy. I prefer this technique for new builds and areas with recent compaction, urban sites, and situations where old trees are beginning to decline. This is another almost year-round service.


Root zone Invigoration

The most extensive of entire root zone services we offer is root zone invigoration. In this technique, we use the air spade to remove all the grass, soil, or competing plants sitting on top of the tree's root system. We then correct any girdling and planting depth problems. Finally, we replace the entire space with our compost blend. This is a big, messy, expensive procedure but often the best solution when a valued small to medium-sized tree is being damaged by mowers, vandalism, or when there is an especially dense or aggressive plant growing above the root zone. I prefer this service to occur during winter dormancy, but in extreme cases, it can be performed any time roots are too restricted to function properly.

It’s easy to forget about your trees while they're sitting leafless in winter - but this can be the most beneficial time to give them attention. Caring for your tree's roots is often more beneficial than pruning, spraying fungicides, or almost any other plant health care service.

Sincerely,

Mitch Lippencott I Regional Manager, Russell Tree Experts

Mitchell Lippencott joined Russell Tree Experts in 2020 and has been in the green industry for over 20+ years with a diverse background ranging from working for a landscape design company, a retail garden center, and two municipalities! Mitch is an alum from The Ohio State University, a licensed pesticide applicator, a qualified tree risk assessor, and an ISA certified arborist. Outside of work, he enjoys traveling, cooking, and gardening.

Root for YOUR Tree and Learn More BELOW!

10 Boxwood Alternatives

Dear Reader,

My introduction into the horticultural world was working at a small retail nursery in the early 2000s. Back then, when a customer would ask for an easy to grow, low maintenance, no brainer plant, boxwood is what we would often recommend. Fast forward twenty years and today boxwood have to contend with boxwood leaf miner, boxwood psyllid, spider mites, volutella stem canker, winterburn, boxwood blight and most recently, a new disease known as boxwood dieback. Historically, Boxwood have been appreciated in the landscape because they are evergreen, deer proof, compact, easy to manipulate and respond well to pruning/shearing. But they are no longer the maintenance free, easy to grow plants they once were. 2023 was a particularly bad year for boxwood in central Ohio and every arborist, landscaper and plant person I know was overwhelmed with calls from desperate clients willing to try anything to restore their boxwood to how they once looked. Many of the boxwood installations I observed this year are beyond preservation. Others will likely recover over the next two to three growing seasons but may look a little rough along the way. Much of the damage that occurred to boxwood this year is a result of the cold weather event we had just before the holiday season of 2022, where temperatures changed from 40 degrees Fahrenheit into the negatives in less than 12 hours. There is no topical spray or any professional service that can be offered to combat this sort of environmental event. And many of the boxwood that were able to survive the initial cold temperatures succumbed later to disease spreading pathogens seeking a stressed and vulnerable host. Even under normal weather conditions, most boxwood require regular applications of insecticides and dormant oils to protect them from insect pests that have taken advantage of their abundance. The best management strategy for the prevention of disease and insect pests on our plants is to use plants that do not get those diseases and insect pests. So as you are wrapping up your Fall landscape plantings or making plans for next Spring, consider something new for your hedges, accent plants and foundation plantings. Here are 10 suggestions for plants to consider with similar characteristics to boxwood.

1. Blue Holly

Blue holly (Ilex x meserveae) is a hybrid between the cold hardy Asian prostrate holly (Ilex rugosa) and English holly (Ilex aquifolium). It is one of my personal favorite evergreen shrubs and has lustrous dark green/blue leaves and dark red berries on female plants that ultimately feed the robins and mockingbirds around late winter to early spring. Individual plants form a shrubby upright to pyramidal habit and can grow 8 to 12 feet in height by 6 to 8 feet in width. Blue holly (Ilex x meserveae) can easily be pruned into hedges and can be kept at any height or width with minimal, annual pruning. They are cold hardy to -20 degrees Fahrenheit and adaptable to both full sun or partial shade. Several cultivated varieties of this hybrid exist with my personal favorites being Blue Princess and Blue Prince.

NOTE:  Holly plants require a male pollinator to achieve fruit. Make sure to include at least one male plant (like Blue Prince), and possibly more depending on the size of your Holly plantings to improve fruiting.

Negatives: Blue holly (Ilex x meserveae) can have significant leaf burn when temperatures drop below -10 degrees Fahrenheit (although established plants recover quickly in the Spring). They are susceptible to phytophthora (root rot) in poorly drained sites and deer browsing during the winter when snow persists for days at a time.

2. Privet

Privet (Ligustrum spp.) is a densely branched shrub with dark green to yellowish green leaves that can easily be manipulated into rounded plants and hedges. Privet (Ligustrum spp.) is fast growing and adaptable to a wide range of soils and growing conditions; I’ve observed many well kept privet hedges that would give boxwood a run for its money during the spring or summer. The foliage persists late into the fall often turning purple but is not evergreen. There are no serious disease or insect problems and oftentimes plants seem to thrive with neglect. Several different species and many different cultivars exist for a range of size, texture and leaf color.

Negatives: Privet (Ligustrum spp.) is not native to central Ohio and can easily spread by seed into native areas and out compete native species. They are also not evergreen.

3. Wintercreeper euonymus

Until recently I have always considered this species of euonymus to be best used as a ground cover or climber on a tree or trellis. More and more though, I’m seeing it in the landscape pruned into a very small and cute hedge or sculpted into 1 to 2 feet tall and wide mounds looking very similar to boxwood. Euonymus in general is fast growing and adaptable from full sun, to full shade, and to just about any landscape situation that isn’t a swamp. Leaves are evergreen most winters (leaf drop can occur when temps drop below -20 F) and there are dozens of cultivated varieties for leaf size and color. I’m partial to the green and white variegated cultivar ‘Emerald Gaiety.’

Negatives: Wintercreeper euonymus (Euonymus fortunei) is not native and can easily naturalize and take over unmanaged native areas. They can be susceptible to euonymus scale and difficult to treat successfully once a population is established.

4. Spirea

There are several species and dozens of different cultivars of spirea that mimic the compact and rounded habit of boxwood. They can be grown as separate plants, planted in masses or managed as a hedge. Spirea can grow in most landscape situations and will perform well in any soil that is not excessively wet. Spirea are easy to grow, have little insect or disease problems, respond well to pruning and shearing, and are cold hardy and adaptable to full sun and partial shade. Spirea are deciduous but even without leaves, the stems and twigs are so dense that the structure of the plant still provides texture and interest in the winter landscape.

Negatives: Spirea are not evergreen. They can get powdery mildew but it has little impact on the overall health of the plant. Spirea may also be somewhat overused in the landscape but for good reason - it is almost impossible to kill.

5. Japanese HollY

Japanese holly (Ilex crenata) is another compact evergreen shrub with a rounded habit and dark green foliage through the growing season and through the winter. They can grow 3 to 5 feet in height and width, although I have observed larger plants in arboreta. Japanese holly (Ilex crenata) is cold hardy to - 20 degrees Fahrenheit and adaptable to both full sun or partial shade. They respond well to pruning/shearing and can be used in hedges, foundation plantings, or in masses. Several different cultivars are available for different sizes, colors, and superior cold hardiness.

Negatives: Japanese holly (Ilex crenata) is slow growing and not tolerant of high pH soils. They are a preferred host to spider mites during extended periods of drought. Japanese holly (Ilex crenata) is not well known in Ohio and could be difficult to source. I would avoid using the upright cultivar ‘Sky pencil’ unless in a warmer protected spot with exceptionally well drained soil.

6. Globe arborvitae

Globe arborvitae (Thuja occidentalis ‘Globosa’ or ‘Little Gem’) is a compact and rounded form of our native eastern arborvitae. Its leaves are bright green in the spring and summer but turn more bronze or yellowish green during the winter months. Globosa arborvitae is a dwarf form and matures to only 5 to 6 feet tall and wide. They are very adaptable to different soil types and respond well to pruning and shearing. Globosa arborvitae can be used as a specimen plant or accent plant as well as in hedges or foundation plantings. Little gem arborvitae has essentially the same habit as globosa arborvitae but are smaller, maturing to a height of about only 3 feet tall. Either cultivar will perform well from full sun to partial shade (but they should have at least a half day of sunlight).

Negatives: Deer will eat arborvitae to bare wood when hungry. They are also a preferred host to bagworm and spider mites.

7. Yew

Yew (Taxus spp.) is a hardy and easy to grow evergreen shrub. I use them primarily for screening in the parts of my garden that receive less sun, but they can be easily manipulated and sculpted into tight hedges, mazes, and formal shapes in the same fashion that we often treat boxwood. Yew are very adaptable and urban tolerant and can withstand almost any amount of pruning. They will grow well in sun and shade and have few disease or pest problems. If they are used as an alternative to boxwood, I recommend the cultivars ‘Runyan’ or ‘Densiformis’.

Negatives: Yew are susceptible to deer browsing


8. Japanese Plum Yew 

Japanese plum yew (Cephalotaxus harringtonia) is similar to yew, but with longer and glossier needles. I have planted this in more than one rural location and my experience so far is that deer will not touch them. Japanese plum yew (Cephalotaxus harringtonia) should be considered by anyone that likes yew but has given up because of continual deer damage. There are several different cultivars selected for a range of different sizes and habits but ‘Duke Gardens’ is the cultivar I recommend for central Ohio gardens and for anyone wishing to experiment with using Japanese plum yew (Cephalotaxus harringtonia) to replace boxwood. This cultivar matures to approximately 2 to 3 feet in height, approximately 3 to 4 feet in width and is cold hardy to - 20 degree fahrenheit.  There are no serious pest or disease problems.

Negatives: Straight species is not cold hardy in true zone 5 winters (winters that reach -20 F). I observed significant winterburn in the plants in my garden from the cold snap we had just before the holiday season of 2022.


9. Inkberry 

This is one of the boxwood alternatives that I think has the most potential. Inkberry (Ilex glabra) is native to the east coastal plains of the US and is a compact evergreen shrub with lustrous, dark green leaves during the growing season. Foliage can bronze somewhat during the winter months. Without pruning, inkberry (Ilex glabra) can reach heights of 6 to 8 feet tall with a width of 8 to 10 feet wide. Female plants can produce a small, pea-sized black berry (hence the name inkberry) that is edible to birds. Inkberry (Ilex glabra) performs well from full sun to full shade (foliage density is better with at least 5 to 6 hours of sunlight) and is cold hardy to - 20 degrees fahrenheit; although I have observed winterburn in exposed plants during winters with temperatures that have dropped below zero for extended periods of time. Inkberry (Ilex glabra) responds quite well to heavy pruning or shearing and has strong regenerative growth in established plants. They can easily be used as individual specimen plants or in hedges. I recommend using the cultivars ‘Cape Cod’ or ‘Compacta’ if available. These selections maintain a more rounded and compact habit with less pruning.

Negatives: Inkberry (Ilex glabra) is not tolerant of excessively high pH soils and plants can lose lower leaves and become quite leggy if not well managed. I have observed significant deer browsing during periods of extended snow cover in landscapes with a high deer population.

10. Canadian Hemlock

Canadian hemlock (Tsuga canadensis) is one of my favorite evergreen trees. It is a native and graceful evergreen tree with glossy dark green needles that also responds well to aggressive pruning. When my wife and I moved into our current home in 2008, we planted 36 Canadian hemlock (Tsuga canadensis) on 5 foot centers around the perimeter of our front and side yards. We keep these plants sculpted into a tight 6 feet tall by 3 feet wide pyramidal shaped hedge which we prune once a year in the late spring, approximately a month after new growth has pushed out. This could make an excellent replacement for a tall boxwood hedge.

Negatives: Canadian hemlock (Tsuga canadensis) is susceptible to deer browsing during the winter months with extended periods of snow. They are a preferred host to spruce spider mites when under stress. Canadian hemlock (Tsuga canadensis) also have poor tolerance to drought.


These 10 plants are just the beginning of the conversation regarding boxwood alternatives. There are dozens of other cultivated varieties of chamaecyparis, juniper, spruce, pine, fir, leucothoe, etc that could fulfill the same niche in many of our gardens. I believe there is a perfect substitute out there for every plant. The perfect substitute for your needs will depend on your individual situation and landscape.

Sincerely,


TJ Nagel I Scheduling Production Manager, Russell Tree Experts

TJ loves trees. He is an avid gardener and plant collector. TJ graduated from The Ohio State University with a B.S. in Agriculture with a major in Landscape Horticulture and minor in Entomology. TJ is an ISA Board Certified Master Arborist and well versed in Plant Pathology. TJ joined Russell Tree Experts in 2012.


Illustrations by Kenny Greer, Russell Tree Experts

How to Plant a Balled-and-Burlapped Tree!

Dear Reader,

TJ Nagel and Mike McKee standing in front of a newly planted ginkgo tree.

My friend and colleague Mike McKee (an ISA certified arborist at Russell Tree Experts) and I were discussing recently how rarely we see a properly planted landscape tree. Every day we are out and about talking with folks who have stressed trees that are planted too deep, or that are being girdled by landscape materials or trees that are simply planted in the wrong location. Much of the tree preservation and tree removal work that we perform is a result of trees that were improperly planted. 

Russell Tree Experts does not offer tree planting services but Mike and I decided it would be valuable to write this article and make a how-to video on what we believe is the best way to plant a balled-and-burlapped tree (although much of the video can apply to trees growing in containers as well). The goal of this article and video is to empower everyone to be able to plant a tree correctly and to be able to recognize what a properly planted tree is supposed to look like. 

The following is a checklist of essential steps that should be followed when installing (or having installed by a contractor) a new balled-and-burlapped tree.

 1. Plant the Right Tree

There is a tree out there for every landscape situation. It is important that you choose wisely when you are selecting a tree for your situation. If planting in a low site that regularly experiences flooding or standing water you might consider a bald cypress, willow or sycamore, something that is water loving/tolerant. If planting in an excessively dry area you may consider a ginkgo or some type of elm. If you are planting under overhead utilities, planting a smaller statured tree such as a redbud, will likely help to avoid conflict between the lines and tree in the future. Planting the right tree in the right location is the most important step. You may follow the rest of this checklist flawlessly but if you select the wrong tree, it was all in vain. If you are uncertain of what the right tree is for your situation, it’s worth hiring an arborist for a consultation and I know a few good ones.

 2. Plant at the Right Time

Fall is for planting. Early Spring is pretty good too. Planting a new tree during either of these times while the tree is in or approaching a dormant state will improve survivability by avoiding a lot of the initial stresses trees experience during the growing season like heat and drought.

3. Tree Pruning

If a tree could only be pruned once in its life, pruning at planting is the time to do so. The overall goal of pruning at planting is to improve the structure of the canopy, to remove crossing and broken limbs, or to reduce/remove upright limbs that might be competing to be the central dominant leader. Note: It is equally important not to over prune a newly planted tree, as having the appropriate amount of leaf area in the canopy next season is essential to maintaining good health and vigor. 

 4. Locate the Tree’s Trunk Flare/Buttress Roots

The trunk flare will be found low on the main stem and should be the portion of the tree that gets wider just before ground level. Locating the trunk flare is essential for determining the depth of the hole you are about to dig for the tree.  

Two examples of root flare, which is where the trunk and roots of a tree meet.

5. Begin Digging!

Dig a hole that is 1.5 - 2 times the diameter of your root ball to allow loose soil to be backfilled around the rootball, which will be easy for new roots to penetrate. Do not dig the hole any deeper than the distance between the bottom of the root ball and the trunk flare. It is important that the trunk flare is at or slightly above grade once it has been placed in the planting hole. If the trunk flare is below grade, the tree will be planted too deep and will be more prone to stem girdling roots, reduced vigor, and will become more vulnerable to pests and disease. Important Note: Many balled-and-burlapped trees are already too deep within their own root ball. Do not assume that the top of the root ball is the trunk flare. My experience is that more often than not, I have to remove a few inches of soil from above the trunk flare at the time of planting. This can be seen in the video as well. Linked down below is my fellow coworker Chris Gill’s Arbor Ed article on stem girdling roots.

6. Stabilize the root balL

Stabilize the root ball in the hole. After the tree is standing upright in the hole, verify that it is positioned correctly (centered and upright) and add soil around the bottom six to eight inches of the root ball. Tamp the newly added soil to stabilize the root ball and tree while adjustments to the root ball are made. 

 7. Remove the twine, Top 1/3 of Burlap, and Top 1/3 of Wire Cage

Remove the twine around the trunk, remove the top third of the burlap and remove the top third (approximately) of the wire cage. The purpose of removing these materials is to prevent damage to the trunk and buttress roots as they grow over time. Removing the twine, burlap and wire cage is the subject of much debate amongst landscape contractors, tree producers, and arborists. In an effort to be brief, our recommendation to remove the top third of the wire cage, the exposed burlap (approximately the top third), and the twine is a balance between ensuring root ball stability/new tree survivability and planning for the long term health of the tree over the next hundred years. There may be some instances, like planting new evergreen trees in exposed/windy sites where it may be acceptable to leave the entire wire cage, burlap and twine intact for one full growing season before returning to remove it later.

8. Verify Tree’s PositioninG AND BEGIN BACKFILLING

Verify again that the tree is still positioned correctly. Mix a small amount of compost into the existing soil and begin backfilling the remaining portions of the hole with this mix. Lightly tamp the soil to remove air pockets but be careful not to overly compact soil as pore space is needed for water and oxygen.

Adding compost or a soil amendment to the existing soil is one way to attempt to improve soil structure and nutrient availability. Not every newly planted tree requires soil amendment. If you are planting in a native area where the soils have not been disturbed previously, you likely can backfill with just the existing soil that came from the planting site. 

9. Mulch around the tree

Apply a 1-to-2 inch tall mulch ring around the trunk of the tree that extends out to the canopy drip line.

Mulch correctly around the tree. Once the tree has been planted with the trunk flare just above ground level, it is time to add one to two inches of mulch. It is important that mulch is not over applied or mounded around the main stem. It should be applied evenly around the main stem with a small berm on the outside edge that directs water toward the tree. I generally recommend pine bark or hardwood mulch although I’ve started using pine needle mulch around trees and shrubs that like a more acidic soil. Mulch does a great job of retaining moisture around newly planted trees in addition to reducing competition from weeds, regulating soil temperatures, reducing soil compaction and adding nutrients to the soil. Linked below is my fellow coworker Lindsey Rice’s Arbor Ed article on how to mulch around a tree.


10. Water YOUR TREE

Watering a newly planted tree correctly is as important as selecting the right tree. Watering is the single most important maintenance factor in the establishment and success of planting a new tree. The best way to water a tree is slowly and deeply so that water is trickling down into the root ball of the tree and not washing away into the lawn. A newly planted balled-and-burlapped tree should be watered at the time of planting and then once a week until temperatures are consistently below freezing. Watering in this same fashion should resume when the tree breaks dormancy and leafs out the following Spring. It generally takes 2 - 3 growing seasons before a balled-and-burlapped tree is established and can fend for its own water.   Establishment could take longer with larger trees. For more information on watering, see my previous Arbor Ed article and video on how to water a tree linked down below.


11. Protect YOUR TRee!

Ginkgo biloba with deer protection.

Protect your tree from mechanical damage. This step may not be necessary for every newly planted tree. If you live in an urban area without deer and have large generous planting beds free of turf, you can likely skip this step. When planting in rural areas, I often recommend using some sort of deer protection to protect the trunk of trees until they have surpassed eight to ten inches in diameter. I like to use a 4 foot tall wire fencing cut into a 7 - 8 foot length and then wrapped around the tree. In addition to protecting the trunk, the fencing also makes it more difficult for deer to feed on lower limbs. Trunk guards or corrugated drain pipe can also work to protect tree trunks, but they must be removed before the heat and humidity of the summer. I also recommend trunk protection for folks that have trees in areas where turf is tightly managed with large and fast moving mowers and string trimmers.

12. ENJOY!

Your new tree is now planted! Enjoy it! If there are any tags on the tree, you can remove them now if you have not done so already. I hope you enjoyed this article and the video below. Please reach out if you have any questions, happy planting!

Check Out These Related Arbor Ed Articles!

Sincerely,

TJ Nagel I Scheduling Production Manager, Russell Tree Experts

TJ loves trees. He is an avid gardener and plant collector. TJ graduated from The Ohio State University with a B.S. in Agriculture with a major in Landscape Horticulture and minor in Entomology. TJ is an ISA Board Certified Master Arborist and well versed in Plant Pathology. TJ joined Russell Tree Experts in 2012.

How to Plant a Tree

Dear Reader,

Today I would like to discuss step-by-step how Board Certified Master Arborist TJ Nagel plants a tree! He very kindly planted a kwanzan cherry tree for me at my house that was donated by him, Cindy, one of our office managers, and Mark, our fleet manager! At the bottom of this article is a YouTube video where you can visually follow along!

THE STEPS

  1. First, pick out a tree! TJ and I went to Oakland Nursery and selected a kwanzan cherry tree. To help in the planting process, we brought mushroom compost, mulch, a trowel, a shovel, and a pickaxe. Mushroom compost will help enrich the soil. Mulch will help with water retention, temperature regulation, protection from lawn mowers, and curb appeal. A trowel, a shovel, and a pickaxe will help in the digging process.

  2. Choose a tree planting site! We chose in front a picture window in the front yard for viewing pleasure and as it was a few feet away from any obstructions such as my neighbor’s driveway, the sidewalk, my front porch steps, and nearby plants. We also knew that we were not planting directly on top of any pipes or water lines.

  3. Dig your hole! The hole should be slightly wider but just a few inches shallower than the size of the tree’s pot. You will want a couple extra inches around the circumference of the root ball to pack in compost and dirt. We also like to plant most trees a few inches above the surrounding ground level as the tree could settle over the next couple of years, which is why the hole can be a few inches shallower than the depth of the root ball.

  4. Take the tree out from the pot and cut 4 straight lines across the root ball. This will break up and loosen both the dirt and roots which will help minimize the risk of stem girdling roots. Optionally, you can also clean up and remove any small or entangled surface roots.

  5. Test fit your tree and check if the hole’s depth is adequate. As mentioned earlier, you will want a few extra inches of space around the circumference of the tree and you will want the tree to sit a few inches above the surrounding ground level. Make adjustments to your hole if needed.

  6. Mix up the mushroom compost with the existing, dug up soil with an approximate 1:1 ratio to help enrich the soil and promote growth. You can break up any chunks of dirt to obtain a fine, well blended mixture. If a few grass blades end up in the mixture, it is okay as it will decompose and help enrich the soil with nutrients. As long as there is no significant sod or roots on the surface, there should be no significant risk of weeds. To further minimize the risk of weeds and for aesthetic purposes, we will be placing mulch over top of the soil.

  7. Place your tree in the the hole and fill it with your blended soil mixture! Be sure to keep your tree straight and upright while filling in your hole. You will want to lightly compact the soil mixture so that way the tree is stable during windy weather and does not lean or fall over.

  8. Water the soil!

  9. Apply a couple inches of mulch on top of the soil! Keep the trunk exposed and not covered with soil and also avoid creating a mulch volcano in order to minimize the risk of stem girdling roots. We shaped a small, subtle and almost unnoticeable moat around the perimeter of the elevated soil level to help water flow and soak towards the trunk.

  10. Water the mulch!

  11. And voila, your tree is now planted! Or in this case, this beautiful kwanzan cherry tree is now planted! If there are any tags on the tree, you can remove them now if you have not done so already. Optionally, TJ also made a few minor pruning cuts but this is not always necessary.

The first year is vital for a newly planted tree’s survival so make sure that it does not lean over, that it does not get chewed on or rubbed by any animals like deer, and that it gets properly watered, which can be once to twice per week depending on the season, your local climate, and the way the tree is packaged. You can optionally use a tree trunk guard or posts to help protect your tree and keep it straight but it may not be necessary depending on where you live.

I personally would like to give the hugest shoutout to TJ, Cindy, and Mark for donating and planting this tree. Earlier this year, my sister passed away and she loves kwanzan cherry trees. She loves their spring colors, has posters and images of them in her room and on her phone, and uses the Japanese cherry blossom scent for all her Bath & Body Works products. This sentiment is incredibly touching and meaningful and I cannot be more appreciative.

As mentioned earlier, linked down below is a step-by-step YouTube video you can follow along with as well as a few related tree planting articles! Hopefully you found this article educational and entertaining!

HOW TO PLANT A TREE BY AN ISA BOARD CERTIFIED MASTER ARBORIST

ADDITIONAL READS

How to Mulch Around a Tree
by Enrique Arayata

10 Trees with Amazing Fall Color… And One You Should Avoid!
by TJ Nagel

Why Can’t I Plant a Tree Just Anywhere?
by Enrique Arayata

Planting Trees for a Purpose
by Mike McKee


Sincerely,

Enrique Arayata I Media Production Coordinator, Russell Tree Experts

Enrique is a fifth year student at The Ohio State University majoring in moving image production with a double minor in film studies and photography. In his free time, he enjoys fitness, technology, cars, videography, photography, and cooking.

Why Can’t I Plant a Tree Just Anywhere?

When I first began working at Russell Tree Experts as a video production assistant, I had no significant prior knowledge of arboriculture, and I never really understood the concept of tree planting. My overall impression was that trees are good for the environment as they provide oxygen, contribute to an ecosystem, and are visually pleasing to look at and enjoy.

Planting Trees for a Purpose

I think we all can agree that our TREE FOR A TREE® program is an awesome idea for replacing the trees that we remove, but as I set in the office watching nature happen outside my window, I started thinking of other reasons to plant trees. Trees provide countless benefits to our environment as well as providing food and shelter for a number of living organisms. Anytime that I am walking through a property I cannot help but notice the birds enjoying all that the trees are providing for them. I decided to write about planting trees that provide shelter and food for birds throughout the year.

Best Practices for Watering Your Trees

Last Fall I planted a Nikko maple (Acer maximowiczianum) for one of my neighbors. Somewhat uncommon, Nikko maple is a small statured, 20 - 30’ at maturity, trifoliate, hardy tree with nice fall color. It has good urban tolerance and was a good fit for its location with overhead utilities. I have been watering this tree somewhat regularly with a large watering can that I can easily carry across the street and have been pleased with the healthy appearance and good amount of new growth that has emerged this year. As far as I could tell the tree looked great so you can imagine my surprise when I came home recently from a long weekend getaway and discovered that the top half of the tree’s canopy had turned brown.

"Can you recommend a tree that is not messy?"

“Can you recommend a tree that is not messy? One that will not drop fruit, or twigs, or stuff all over the place.” This is perhaps the request I run into the most when someone wants advice on what trees to plant. The first time I heard this one I had to fight the urge to smile and reply that yes, there are trees like that which also happen to be disease-free, not attacked by any pest, grow quickly (instantly, in fact) to the desired size, shape, and color you want them to be and never need to be pruned…

10 Trees with Amazing Fall Color... and One You Should Avoid!

I was recently pruning trees in a newer neighborhood on the east side of Columbus where every house had two red maple in the front yard.  Although Red maple is a native tree to Ohio, this subdivision was planted with a cultivated variety of the species called ‘Red Sunset.’ ‘Red Sunset’ red maple was selected and well marketed for its compact habit, good branching structure and most notably for its showy and reliable orange to red fall color.

Ask An Arborist: What Should I Plant?

@thearachnidkid: 
We just bought a house with no trees or even shrubs in the yard. We want a bigger shade tree, and some smaller ones. We both want fruit or nut trees. And I love birch trees. We have our lot our house is on and a whole additional lot, so we have plenty of space. Can you recommend some types of trees and tell me when is a good time to plant them?